
Steps After Home Renovation: Your Completion Checklist
Table of Contents
- Conduct a Final Walkthrough and Inspection
- How to Manage Contractor Final Payment
- Renovation Permit Closure Process
- Post-Renovation Cleaning Checklist
- Collect and Organize Warranty Documentation
- Update Your Home Insurance and Property Assessment
- Establish Maintenance Schedules for New Systems
- Frequently Asked Questions
Last Updated: September 30, 2026
Conduct a Final Walkthrough and Inspection
A final walkthrough is one of the key steps after home renovation, verifying that everything matches your agreement and catching issues before final payment.
Review the punch list (incomplete or minor items needing attention) with your contractor. Walk through every room systematically, checking cabinets, doors, windows, fixtures, lights, switches, water pressure, and finishes for gaps, unevenness, or drips.
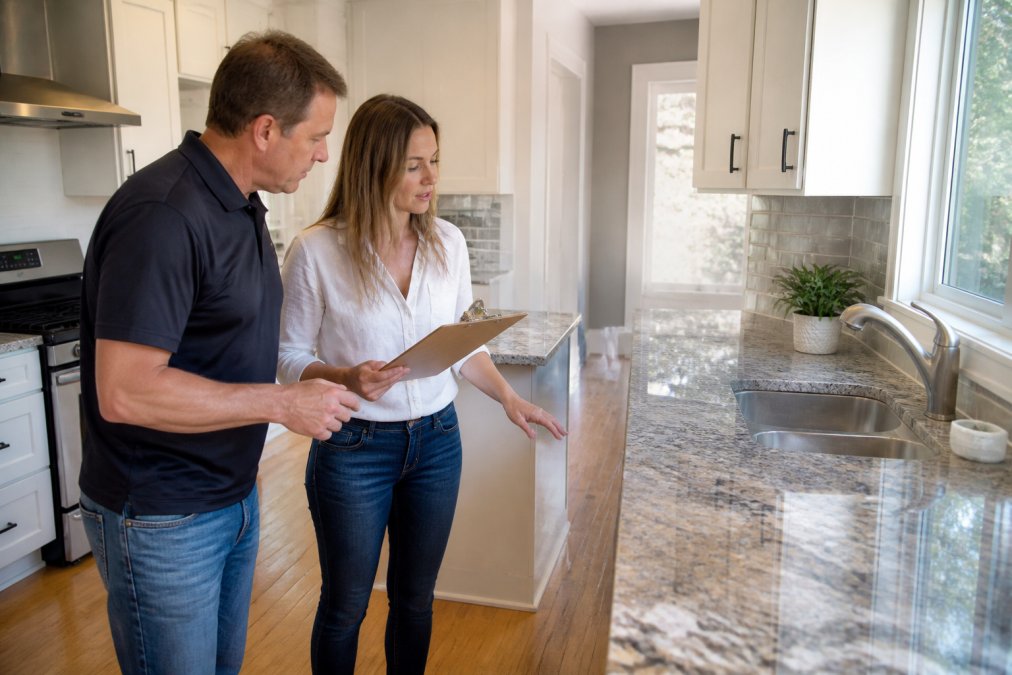
Document issues with photos or specific notes (e.g., “Grout line in master bath is uneven”) so your contractor can fix problems properly.
Review the punch list with your contractor
Go through the list item by item and set deadlines. Common items include touch-up paint, caulking gaps, adjusting cabinet doors, tightening fixtures, and debris cleanup. Email your contractor a written summary to create a paper trail.
Check all systems and finishes
Test every system: electrical outlets and switches, water pressure, HVAC vents, windows and doors (should move smoothly), appliances, plumbing (check for leaks), and finishes (paint, grout, drywall seams, flooring). Report issues immediately, small fixes are easier before the contractor leaves.
How to Manage Contractor Final Payment
Never pay in full until the work is complete and you’re satisfied. Verify the contractor’s claim before payment changes hands to ensure clear agreement on completion.
Verify work completion before paying
Review the original contract against finished work. Walk through with the contractor present and point out discrepancies. Request proof of completion for major systems: inspection certificates for electrical, pressure testing for plumbing, commissioning for HVAC. Verify the site is clean and ready to use.
Obtain lien waivers and documentation
Request a statutory declaration or lien waiver from your contractor, a legal document stating that the contractor and suppliers have been paid in full and won’t claim against your property. This protects you from supplier or subcontractor claims.
Request invoices, permits, insurance proof, warranties, and inspection reports. Organize these in a folder (digital or physical) for insurance claims, home sales, or warranty issues. For large renovations, contact suppliers directly to confirm payment.
Renovation Permit Closure Process
Contact your local building department to close the permit. Schedule a final inspection to verify the work meets code and approved plans. Address any violations immediately. Once approved, the municipality issues a permit closure certificate, keep it with your home records for future sales or insurance claims.
Post-Renovation Cleaning Checklist
Post-renovation cleaning removes dust and chemical residues from paint, stain, adhesives, and sealants that off-gas for days or weeks after installation.
Deep clean surfaces and manage air quality
Work top-to-bottom: dust ceiling vents and fixtures, wipe walls and baseboards, clean cabinets and shelves. Vacuum thoroughly with a HEPA filter, including under baseboards. Mop hard floors per manufacturer instructions. Clean windows inside and out with lint-free cloths.
Address off-gassing and chemical residues
New paint, stain, adhesives, and caulk release volatile organic compounds (VOCs) for days or weeks. Open windows for at least 48 to 72 hours continuously, using cross-ventilation or portable fans. Check product data sheets for specific off-gassing timelines. Keep the space well-ventilated and avoid sealing immediately after installation.
Restore HVAC system function
Change HVAC filters immediately after renovation. If ductwork or HVAC work was done, have the system professionally cleaned. Run the system continuously for 24 to 48 hours to cycle air through filters and remove particles, then return to normal operation.
Timeline for moving back in
Single-room renovations: ventilate the space 48 to 72 hours before regular use. Whole-home renovations: stay elsewhere for at least 48 hours. After 72 hours of ventilation, air quality should be acceptable. If odors persist beyond one week, request additional ventilation or contractor follow-up.
Collect and Organize Warranty Documentation
Collect and organize warranty documents for all new materials, appliances, and systems. Understand claim procedures, holdback periods, and responsibility to avoid headaches later.
Gather all warranty documents from your contractor
Ask your contractor for warranty information on everything installed. Request both the original manufacturer documentation and any extended warranties or service plans they may have included. This includes:
- Appliance warranties from manufacturers (typically 1 to 5 years depending on the appliance)
- Paint and stain warranties from suppliers (often 5 to 10 years for coverage against peeling or fading)
- Flooring warranties from manufacturers (varies widely: laminate 5 to 10 years, hardwood 25+ years, tile often lifetime)
- HVAC system warranties from the installer (usually 5 to 10 years on parts and labour)
- Plumbing fixture warranties (typically 1 to 5 years)
- Electrical component warranties (varies by component)
- Structural or framing warranties (often 5 to 10 years on workmanship)
Request a written summary from your contractor listing every item installed, its warranty period, and the start date. This prevents disputes later about what was covered and when coverage began.
Understand manufacturer vs. installer warranties
Most products come with two separate warranties: the manufacturer’s warranty (covers defects in the product itself) and the installer’s or contractor’s warranty (covers workmanship and installation quality).
For example, a new furnace may have a 10-year manufacturer’s warranty on the heat exchanger but only a 5-year contractor warranty on labour and installation. If the furnace fails due to a manufacturing defect, the manufacturer covers it. If it fails because the installer didn’t set it up correctly, the contractor is responsible.
Understand which warranty applies to different failure scenarios. Ask your contractor to clarify this in writing. When something fails, you’ll know whether to contact the manufacturer or the contractor first.
Create a warranty tracking system
Create a warranty folder, physical or digital. Store copies of every warranty document, receipt, and invoice in one place. Use a spreadsheet or simple document to track:
- Item name and location (e.g., “Kitchen faucet, main sink”)
- Warranty period (e.g., “5 years from installation”)
- Start date (e.g., “September 15, 2026”)
- Expiration date (e.g., “September 15, 2031”)
- Warranty type (manufacturer, contractor, or both)
- Claim procedure (phone number, website, or process)
- Registration required? (Yes/No, and deadline if applicable)
Set phone reminders for items with shorter warranties (1 to 2 years). You want to catch failures while coverage is active.
Register products for warranty coverage
Many appliances and systems require registration within a specific timeframe, often 30 to 90 days, to activate full warranty coverage. Failure to register can void the warranty or reduce coverage.
Check each warranty document for registration instructions. Some manufacturers require online registration; others ask for proof of purchase mailed in. Do this immediately after installation, not months later.
Keep proof of registration (confirmation email, receipt, or registration number) in your warranty folder. If you ever need to file a claim, you’ll have evidence that the product was registered on time.
Understand holdback and final payment mechanics
In many provinces, contractors are required to hold back a percentage of the contract price (typically 10%) until a specified period after work completion, usually 45 days. This holdback protects you if defects emerge after the contractor leaves.
During the holdback period, if something covered by warranty fails or doesn’t work as agreed, you can use the holdback to pay for repairs without waiting for the contractor to return. After the holdback period expires and no issues have surfaced, the contractor receives final payment.
Understand your contract’s holdback terms. Ask your contractor when the holdback period ends and when you should expect final payment. This is also when you should confirm that all warranty documentation has been provided and that any items on the punch list have been completed.
Know how to file a warranty claim
When something fails, don’t assume the warranty covers it. Review the warranty document first. Most warranties exclude damage from misuse, lack of maintenance, or normal wear and tear.
For manufacturer claims, contact the manufacturer directly using the phone number or website on the warranty document. Have your proof of purchase and registration number ready. The manufacturer will ask you to describe the failure and may request photos or a video.
For contractor claims, contact your contractor in writing (email is best). Describe the issue clearly and reference the warranty.
Retain documentation for future home sales
When you sell your home, buyers want proof that major systems and appliances are under warranty or have been well-maintained. Provide copies of warranty documents and maintenance records to the buyer’s inspector or real estate agent.
Update Your Home Insurance and Property Assessment
Your renovation likely increased your home’s value. Your insurance and property assessment need to reflect this change.
Establish Maintenance Schedules for New Systems
New systems and materials need regular maintenance to perform well and last as long as designed. Create a maintenance schedule for everything that was installed or replaced.
Frequently Asked Questions
What should be included in a final renovation punch list?
A punch list documents any incomplete or defective work discovered during the final walkthrough. It should include specific items: touch-ups needed, trim work, paint corrections, fixture adjustments, and any systems not functioning as intended. Walk through every room methodically, check all doors and windows, test electrical outlets and switches, inspect plumbing fixtures, and verify HVAC operation.
Provide the list in writing to your contractor with a deadline for completion before final payment.
How do I handle the final payment and lien waivers after a renovation?
Hold final payment until all work is complete and verified. Request a statutory declaration or lien waiver from your contractor confirming all subcontractors and suppliers have been paid. This protects you from liens filed against your property later. Only then release the final payment. Keep copies of all documentation for your records.
What is the correct process for closing out municipal building permits?
Contact your local municipality to schedule a final inspection once all permitted work is complete. A municipal inspector will verify the work meets building codes. Once approved, request a final permit sign-off or completion certificate. This documentation is essential for property resale and insurance purposes. Your contractor may handle this, but confirm responsibility in writing before renovation begins.
How long does dust settle after a renovation, and how should I clean?
Fine renovation dust can remain airborne for 24-48 hours and settle on surfaces for several days. Start cleaning after dust settles: vacuum thoroughly with a HEPA filter, wipe all surfaces with damp cloths, clean air vents and returns, and wash windows. For air quality, open windows for ventilation and consider running air purifiers. Deep cleaning typically takes 2-3 days depending on renovation scope.
Table of Contents
Diagnose Your Basement Moisture Before InsulatingIdentifying water intrusion sourcesMeasuring moisture levelsBest Insulation for…

Table of Contents
1. Optimize Your Small Kitchen Layout Ideas for Better FlowGalley Layouts for Narrow SpacesL-Shaped ConfigurationsSingle-Wall…