
How to Design a Functional Kitchen Work Triangle
Table of Contents
- What the Kitchen Work Triangle Is and Why It Still Works
- Kitchen Work Triangle Measurements: The Numbers That Matter
- Step-by-Step: How to Measure and Plan Your Triangle
- Kitchen Work Triangle Examples for Common Layouts
- Kitchen Work Triangle Alternatives for Modern Kitchens
- Kitchen Layout Mistakes That Break the Triangle
- Frequently Asked Questions
Last Updated: October 14, 2026
What the Kitchen Work Triangle Is and Why It Still Works
The kitchen work triangle is a design rule that places the sink, refrigerator, and cooktop at the three points of a triangle so you can move between them with fewer steps.
Why does a nearly 80-year-old rule still matter? Because kitchens keep getting used the same way: you grab food from the fridge, wash it at the sink, and cook it on the stove.
The kitchen work triangle works because it matches how people actually cook: store, clean, prepare, cook. Get those three points right and the rest of the design gets easier.
The Three Work Centers: Sink, Refrigerator, Cooktop
Each point of the triangle is a work center, not just an appliance: the sink anchors cleaning, the refrigerator anchors storage, and the cooktop anchors cooking.
Think of each center as a small zone: a sink zone with space on both sides for stacking dishes, a fridge zone with counter space for unloading groceries, and a cooktop zone with landing space for hot pans.
If any one of these three centers is missing or poorly placed, the whole triangle falls apart.
Kitchen Work Triangle Measurements: The Numbers That Matter
The classic kitchen work triangle measurements give you a starting range, not a rigid rule. Each leg, the distance between two work centers, should fall between roughly 1.2 and 2.7 metres, and the total perimeter should stay under about 7.9 metres. A triangle that’s too big means too much walking; one that’s too small means cramped work.
Here’s a quick reference for the numbers that matter:
| Measurement | Target Range | Why It Matters |
|---|---|---|
| Each triangle leg | 1.2-2.7 metres | Keeps steps short without crowding |
| Total perimeter | Under 7.9 metres | Prevents wasted walking |
| Aisle width (single cook) | 1.0-1.2 metres | Enough room to open doors and move |
| Aisle width (two cooks) | 1.2-1.5 metres | Lets two people pass without bumping |
| Counter landing space | At least 0.6 metres | Safe spot for hot pans and dishes |
Clear Paths, Walkways, and Obstructions
A triangle only works if the paths between the three points stay clear. Walkways should be free of islands, chairs, trash cans, and open appliance doors. If you have to sidestep a stool to reach the fridge, the layout is fighting you.
Watch for these common obstructions:
- A kitchen island that blocks the path between the sink and stove
- A dishwasher door that swings into the main walkway
- A refrigerator door that opens into a traffic lane
Traffic flow matters too: people passing through to another room should not cut straight through the triangle, or they’ll collide with whoever is cooking.
A kitchen island placed dead center in the triangle is one of the most common layout mistakes. It looks great in photos but forces you to walk around it every time you cook. Measure the clearance before you commit.
Step-by-Step: How to Measure and Plan Your Triangle
You can plan your own triangle before any cabinets come out. Grab a tape measure, a pencil, and graph paper, and follow these steps.
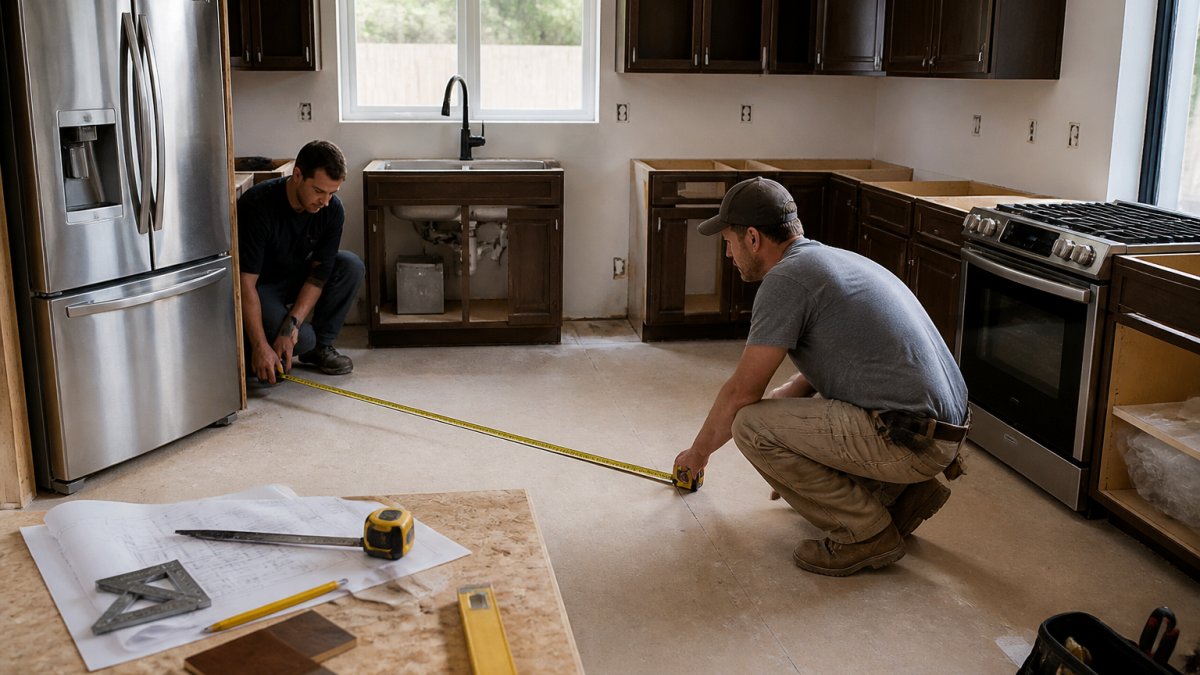
- Mark your three centers. Find the exact spot for the sink, the refrigerator, and the cooktop or stove. Measure to the center of each appliance, not its edge, so the numbers stay consistent.
- Measure each leg. Run the tape from center to center between each pair. Write down all three numbers.
- Add up the perimeter. Total the three legs. If it tops 7.9 metres, the triangle is too spread out.
- Check each leg. Any leg under 1.2 metres or over 2.7 metres needs adjusting.
- Measure your walkways. Confirm at least 1.0 metres of clear aisle, more if two people cook.
- Trace the path. Walk the triangle yourself. Note any door swings, islands, or furniture in the way.
- Sketch it to scale. Draw the triangle on graph paper so you can spot problems before you build.
A Worked Example: 3.6 m x 3.0 m L-Shaped Kitchen
Here is how the process plays out on a common room size: a 3.6 metre by 3.0 metre L-shaped kitchen, long leg along the back wall, short leg along the left.
Step 1, Place the centers.
- Sink center: 1.8 metres from the left corner along the back wall.
- Cooktop center: 0.9 metres from the left corner along the back wall.
- Refrigerator center: 1.5 metres from the corner along the left wall.
Step 2, Measure the legs.
- Sink to cooktop: 0.9 metres (both on the back wall).
- Cooktop to refrigerator: about 1.75 metres (diagonal across the corner).
- Refrigerator to sink: about 2.1 metres (diagonal across the room).
Step 3, Check the perimeter.
- 0.9 + 1.75 + 2.1 = 4.75 metres total. That sits comfortably under the 7.9 metre ceiling.
Step 4, Check each leg.
- The 0.9 metre sink-to-cooktop leg is under the 1.2 metre minimum. This is the most common failure in L-shaped kitchens: the two wet and hot centers end up too close, leaving no landing space between them.
- Fix: slide the cooktop 0.4 metres further from the sink so the leg reaches 1.3 metres, and add a 0.6 metre counter segment between them for hot pans.
Step 5, Check the aisles.
- With a 3.0 metre room depth and 0.6 metre counters on both sides, the aisle is 1.8 metres, generous for two cooks. If an island is added later, keep at least 1.0 metre of clear walkway on each side.
Step 6, Trace the path.
- Walk from fridge to sink to cooktop. Here the fridge door opens toward the left wall, so it does not swing into the cooktop leg; the other way, it would block the diagonal to the sink.
Step 7, Sketch it.
- Draw the L to scale, mark the three centers, and draw the triangle. The 0.9 metre leg will look cramped next to the 2.1 metre leg, that imbalance is your cue to rebalance.
Expected result: Three legs between 1.2 and 2.7 metres, a total under 7.9 metres, and clear paths between all three points. If your numbers fall outside those ranges, adjust appliance placement before you order cabinets.
Measure to appliance centers, not edges. A fridge that is 0.9 metres wide shifts its center by 0.45 metres depending on which edge you start from, enough to push a leg out of range on paper while the room looks fine in person.
Kitchen Work Triangle Examples for Common Layouts
The triangle adapts to almost any floor plan, but each layout has its own quirks. Here are three common layouts.
U-Shaped, L-Shaped, and Galley Layouts
U-shaped kitchen: The triangle fits naturally here. Place the sink at the base of the U, the fridge on one arm, and the cooktop on the other.
L-shaped kitchen: Put the sink and cooktop on one leg and the fridge on the other. The corner becomes a natural prep zone.
Galley kitchen: Two parallel counters create a tight, efficient triangle.
| Layout | Best Placement | Watch Out For |
|---|---|---|
| U-shaped | Sink at base, fridge and cooktop on arms | Aisles too narrow |
| L-shaped | Sink and cooktop on one leg, fridge on other | Fridge blocking traffic |
| Galley | Sink and cooktop on one side, fridge opposite | Aisle under 1.0 metres |
Kitchen Work Triangle Alternatives for Modern Kitchens
The classic triangle has a weakness: it assumes one cook, one sink, one fridge, and one cooktop. Modern kitchens often serve two or more people, add islands and secondary appliances, and blur the lines between kitchen, dining, and living space. That’s where work zones come in, but the triangle is not obsolete. The trick is knowing which model fits your room.
When the Triangle Still Wins
Keep the triangle as your primary planning tool when one person does most of the cooking, the kitchen is closed off, you have a single sink, fridge, and cooktop, and the room is under roughly 15 square metres. The three-point model is faster to plan and easier to check against the 1.2-2.7 metre leg range and 7.9 metre perimeter ceiling.
When to Switch to Work Zones
Switch to task-based zones when any of these apply:
- Two or more people cook at once. A single triangle forces both cooks through the same three points, causing collisions at the sink and cooktop.
- You have an island with a second sink or a prep sink. The island becomes a fourth work center, and a four-point shape is no longer a triangle.
- You have a double oven, a wall oven plus a cooktop, or a range plus a microwave drawer. Each heat source needs its own landing space, so the “cooking center” splits into two.
How to Lay Out Work Zones
Instead of three points, plan four zones, each with its own landing space and clear path:
- Storage zone, refrigerator, pantry, and dry goods. Needs 0.6 metres of counter for unloading groceries.
- Cleaning zone, main sink and dishwasher. Needs 0.6 metres on each side for stacking dirty and clean dishes.
- Prep zone, the largest counter run, ideally between the sink and the cooktop. This is where most of the work happens.
- Cooking zone, cooktop, oven, and microwave. Needs 0.6 metres of landing space on at least one side for hot pans, and ideally on both.
Each zone should be reachable without crossing another cook’s path: in a two-cook household, one person can own prep and cooking while the other owns cleaning and storage.
Handling Islands, Secondary Sinks, and Double Ovens
- Island with a prep sink: Treat the island as its own prep zone, with at least 1.0 metre of clear walkway between it and the main counter run so two people can pass.
- Island without plumbing: Use it as a landing and serving zone, not a work center. An island that blocks the sink-to-cooktop path is worse than no island at all.
- Secondary sink: Assign it to the cleaning zone only if it sits within 1.2 metres of the dishwasher; otherwise treat it as a prep sink and pair it with the prep zone.
Accessibility and Inclusive Planning
Wider aisles and lower counters help people using wheelchairs or walkers. Aim for at least 1.2 metres of clear space between counters, and 1.5 metres where a wheelchair needs to turn. Keep the most-used zone, usually the sink and prep area, within easy reach, and avoid sharp corners. A common pattern is to lower one counter section to 0.75-0.85 metres for seated work, keeping main counters at the standard 0.9 metres.
If you’re planning for aging in place, measure your aisles at 1.2 metres or more. It costs nothing extra during design and prevents a costly rework later.
Work zones suit households with two or more cooks, open-plan layouts, islands with secondary sinks, and anyone planning for accessibility. The classic triangle still works best for single-cook, closed kitchens under roughly 15 square metres.
Kitchen Layout Mistakes That Break the Triangle
Most broken triangles come down to a handful of avoidable errors. Here’s what to watch for, and how to fix each.
- Appliance doors that clash. A fridge door and oven door opening into each other stops work cold. Space them apart.
- A triangle that’s too big. More than 7.9 metres of total travel means extra steps every meal. Pull the centers closer.
- A triangle that’s too small. Legs under 1.2 metres leave no room to work. Add counter space between centers.
A common mistake is chasing a magazine-perfect look and ignoring how the kitchen actually works. Fix the flow first, then style it.
A kitchen that fights you every time you cook needs a better plan. If you’re ready to get the layout right the first time, Mario Laflamme Contracting & Renovation Ltd can help.
Frequently Asked Questions
Is the kitchen work triangle outdated?
The triangle still works for single-cook kitchens, but it needs adjusting for modern layouts. Open-plan kitchens, islands, and multiple appliances can stretch the classic three-point model. Many designers now use work zones alongside the triangle, especially in larger kitchens. The core idea, keeping the sink, refrigerator, and cooktop close without crowding them, remains sound for most renovations.
How do you measure the distance between the sink, stove, and refrigerator?
Measure along the walking path between each appliance, not straight through cabinets or islands. Each triangle leg should fall between 1.2 and 2.7 metres. Add up all three legs, and the total should land between 4 and 7.9 metres. If any leg is shorter than 1.2 metres, two work centers will feel cramped. If a leg runs longer than 2.7 metres, you will take too many steps during meal prep.
Does the work triangle work in an open-plan kitchen?
It can, but the triangle needs boundaries. In an open-plan layout, traffic from living and dining areas often cuts through the cooking zone. Keep the three work centers inside one clear area, and avoid placing the refrigerator or cooktop in the main walking path. If the space is too large for one triangle, split it into two work zones instead of forcing a stretched triangle.
How can multiple cooks share a kitchen efficiently?
Give each cook their own work zone with a landing space, tools, and a clear path. Two cooks in one triangle will bump into each other constantly. A common approach is a primary triangle for the main cook and a secondary zone with its own sink or prep area. Islands work well here because they add counter space and separate tasks without blocking movement.
Table of Contents
Diagnose Your Basement Moisture Before InsulatingIdentifying water intrusion sourcesMeasuring moisture levelsBest Insulation for…

Table of Contents
1. Optimize Your Small Kitchen Layout Ideas for Better FlowGalley Layouts for Narrow SpacesL-Shaped ConfigurationsSingle-Wall…