
How to Choose Bathroom Renovation Materials
Table of Contents
- Understand Your Bathroom’s Moisture and Usage Demands
- Selecting Bathroom Flooring Materials for Water Resistance
- Choosing Shower Wall Materials That Resist Moisture and Mold
- Evaluating Bathroom Countertop Materials for Durability and Maintenance
- Material Compatibility and Installation Considerations
- Your Bathroom Renovation Material Checklist and Selection Workflow
- Frequently Asked Questions
Last Updated: October 15, 2026
Understand Your Bathroom’s Moisture and Usage Demands
Choosing the right bathroom renovation materials starts with understanding what your space needs. A guest bathroom gets light use; a master bath faces constant moisture; a family bathroom sees heavy traffic and spills.
Before picking a tile or countertop, ask: How much moisture does this room generate? Who uses it, and how often? What’s your maintenance tolerance?
A powder room barely gets wet, while a shower enclosure faces daily spray and steam. High humidity breaks down some materials and promotes mold on others, so your moisture profile shapes every decision.
Usage patterns matter too: kids’ bathrooms need durable, easy-to-clean surfaces, master baths can take delicate finishes, and rentals require tough, forgiving materials.
Map your bathroom’s wet zones before shopping. Mark where water splashes, where steam collects, and where daily contact happens. These areas demand the most water-resistant materials.
Selecting Bathroom Flooring Materials for Water Resistance
The bathroom floor takes more punishment than any other surface: standing water, wet feet, dropped bottles, constant traffic. Your flooring choice sets the tone for durability and maintenance.
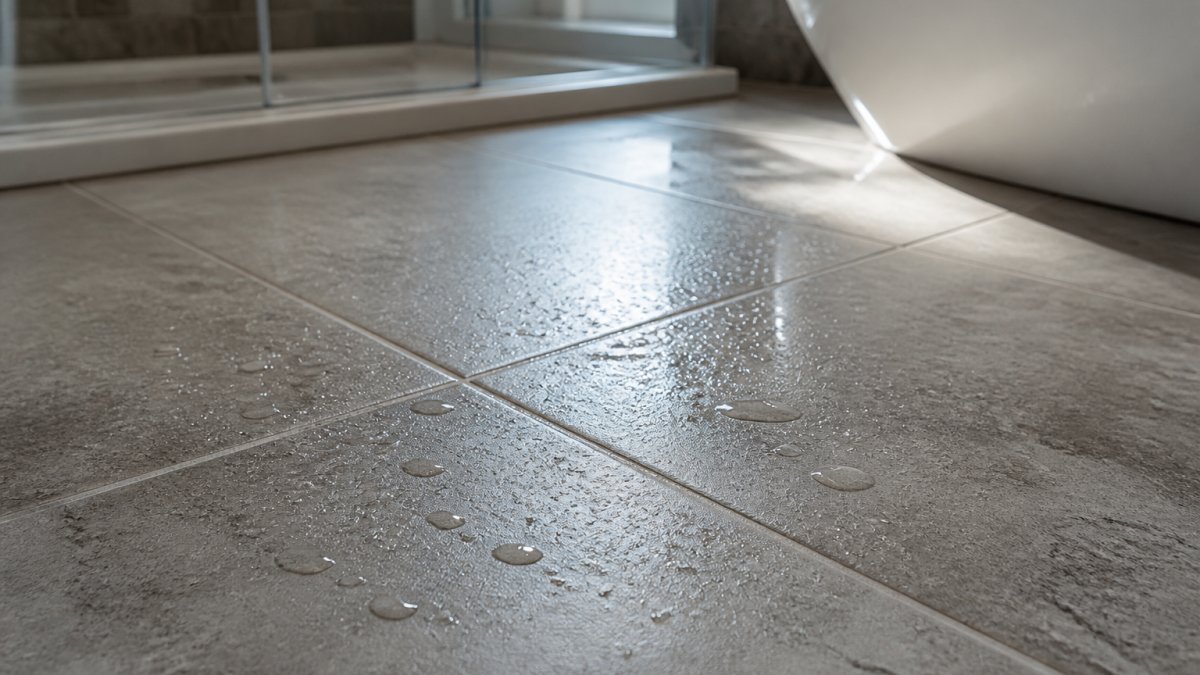
Before comparing products, compare the criteria that decide whether a floor survives: slip resistance when wet, water absorption, substrate requirements, installed cost, and ongoing cleaning and sealing costs.
Ceramic tile remains the industry standard. Glazed ceramic won’t absorb moisture, is affordable, and comes in endless colors and patterns, but grout lines collect dirt and harbor mold if not sealed.
Porcelain tile is denser than ceramic and absorbs almost no water, making it superior for wet areas.
Luxury vinyl plank (LVP) has improved dramatically. Modern planks mimic wood convincingly, are waterproof at the core, warm underfoot, and forgiving when things drop.
Natural stone (marble, granite, slate) looks stunning but demands commitment. It’s porous, needs sealing before installation and periodic resealing, and acidic cleaners damage it.
Concrete works in modern bathrooms. Polished concrete is sleek and minimalist, but it must be sealed against water and stains, it’s hard and cold underfoot, and repairs show.
Installed cost ranges vary by region, substrate condition, and labor, so treat any number as a planning range.
Lifecycle cost matters more than sticker price. A cheap floor needing annual resealing or failing after a leak costs more than a mid-range floor with routine cleaning. What maintenance does it need, and how often? What happens if water gets underneath?
Substrate and waterproofing compatibility decide whether the floor performs. Tile needs a stable, deflection-free subfloor and, in wet areas, a waterproofing membrane or cement board.
Never use unsealed wood flooring in bathrooms. Even “waterproof” engineered wood can fail under constant moisture exposure. The subfloor suffers first, and by the time you notice, structural damage has started.
When shopping, bring a spray bottle of water and test tile samples in the store. A tile that feels grippy when dry can become slick when wet. If you cannot test in person, look for a printed wet DCOF rating of 0.42 or higher.
Accessibility and thresholds are worth planning now rather than retrofitting later. A curbless or low-threshold shower improves safety and usability for people with limited mobility, and flush flooring transitions reduce trip hazards. If aging-in-place is possible, choose slip-resistant flooring and plan grab bar blocking before the tile goes up.
Hard water and humidity affect flooring choice. With hard water, light-colored grout and polished stone show mineral deposits quickly; epoxy grout and porcelain resist staining better than cement grout and porous stone.
Choosing Shower Wall Materials That Resist Moisture and Mold
Shower walls face direct water spray and high humidity, so they need materials that shed water completely and resist mold.
Ceramic and porcelain tile dominate shower installations for good reason: both are waterproof, and denser porcelain is better for high-moisture showers. Install tile with proper waterproofing behind it, water finds gaps, and a quality membrane keeps it from reaching the studs.
Large-format tile (12×24 inches or bigger) reduces grout lines, leaving fewer places for mold and mildew, and creates a cleaner, more modern look. Installation is trickier and costs more, but the maintenance payoff is real.
Acrylic shower surrounds are molded plastic panels: waterproof by design, affordable, and maintenance-free, though they look plastic and can crack or yellow over time. Fine for budget renovations or rentals.
Solid surface materials like quartz or engineered stone offer a middle ground: non-porous, so they resist mold naturally, durable, and upscale-looking. They cost more than tile but less than natural stone.
Natural stone (marble, granite) in showers demands constant sealing. Marble is especially porous and stains easily; avoid it unless you’re committed to maintenance. Slate is more forgiving but still needs sealing.
The real secret to mold-free shower walls isn’t the material, it’s the waterproofing layer behind it. Even tile can fail if water penetrates the substrate. At Mario Laflamme Contracting & Renovation Ltd, we always install a waterproof membrane behind any tile shower. This single step prevents most moisture problems.
Evaluating Bathroom Countertop Materials for Durability and Maintenance
Bathroom countertops see splashing, spilling, and daily contact. They need to resist water, stains, and the products you use on them.
Quartz is engineered stone, crushed quartz bound with resin. It’s non-porous, so it doesn’t stain or absorb water. It’s durable, comes in dozens of colors, and requires only basic cleaning. Quartz costs more than laminate but less than natural stone. It’s the most popular choice for good reason.
Granite is natural stone that’s harder than quartz. It’s porous and must be sealed before use and resealed every 1-3 years. Acidic products (lemon juice, vinegar, certain cleaners) can etch it. Granite looks luxurious but demands maintenance commitment.
Laminate is budget-friendly. Modern laminates mimic stone convincingly. They’re not waterproof, moisture seeping under the edge causes swelling and failure. Laminate works for powder rooms with minimal water exposure, not master baths.
Solid surface (like Corian) is man-made acrylic: non-porous, stain-resistant, and durable, with small scratches that sand out. It costs more than laminate but less than quartz.
Marble is stunning but impractical for bathrooms. It stains easily. Acidic products etch it. It requires constant sealing. Choose marble only if you accept that it will show use and you’ll maintain it obsessively.
Tile countertops are durable and waterproof. Grout lines collect dirt and mold. Tile can chip. It’s hard on dishes and glasses. Tile works best in budget renovations or as an accent.
For bathrooms, prioritize non-porous materials. Quartz and solid surface require minimal maintenance. Natural stone looks beautiful but demands commitment. Laminate fails under bathroom moisture, avoid it for main bathrooms.
Material Compatibility and Installation Considerations
Choosing materials in isolation is a mistake.
Think in layers, not surfaces. A finished bathroom wall is typically framing, a substrate such as cement board or fiber-cement panel, a waterproofing membrane, a bonding layer, tile, and grout or sealant.
Substrate compatibility matters because different finishes demand different backings. Tile requires a dimensionally stable substrate such as cement board or a bonded waterproofing membrane.
Waterproofing integration is non-negotiable. Water doesn’t stop at your tile, it seeps into gaps, under edges, and through grout.
Grout and sealant selection affects durability significantly. Cement-based grout is porous and needs sealing; epoxy grout resists mold and staining better but costs more and is less forgiving to install.
Layout and pattern influence appearance and longevity. Large tiles with fewer grout lines resist mold better and clean easier.
Transitions between materials need planning, how tile meets vinyl, how the wall meets the floor. Proper transitions prevent water pooling at seams and look intentional.
Verification checklist before installation begins:
- Confirm each substrate is flat, dry, and structurally sound.
- Confirm the waterproofing is compatible with the tile, thinset, and grout, and continuous at all corners and penetrations.
- Confirm the tile or stone has a wet slip-resistance rating appropriate for the area.
- Confirm movement joints at changes of plane and perimeters.
- Confirm the installation method matches the manufacturer’s instructions.
- Confirm cure and dry times before grouting, sealing, or water exposure.
Common failure modes to watch for:
- Waterproofing that stops short of the shower curb or drain flange, letting water escape the wet area.
- Grout used where flexible sealant is required, cracking at corners and transitions.
- Substrate movement or deflection that cracks tile or pops vinyl seams.
- Vapor trapped between layers, causing mold or adhesive failure.
- Incompatible thinset or adhesive that won’t bond to the membrane or substrate.
Household and climate factors should shape the specification. Hard water leaves mineral deposits that etch some stone and stain cement grout; epoxy grout and porcelain resist better.
Sustainability and indoor air quality are increasingly part of the specification. Look for low-VOC adhesives, sealants, and grouts, and products with third-party certifications for emissions and responsible sourcing.
Material selection is only half the job. Installation quality and system integration are the other half.
Your Bathroom Renovation Material Checklist and Selection Workflow
Use this workflow to choose materials systematically, preventing expensive mistakes and ensuring your selections work together.
| Decision Point | Key Questions | Best Materials | Avoid |
|---|---|---|---|
| Moisture Level | How wet does this area get? | Porcelain tile, quartz, solid surface | Laminate, unsealed wood, untreated drywall |
| Usage | Heavy traffic or light use? | Porcelain, quartz, vinyl | Marble, natural stone in high-traffic areas |
| Maintenance | How much upkeep will you do? | Quartz, acrylic, vinyl | Marble, granite, natural stone if low commitment |
| Budget | What’s your total investment? | Ceramic, vinyl, laminate (budget); quartz, solid surface (mid); natural stone (premium) | Mixing premium and budget materials haphazardly |
| Aesthetic | What style do you want? | Any material works, choose based on look + durability | Choose look first, durability second |
Step 1: Map your moisture zones. Identify where water splashes, steam collects, and daily contact happens.
Step 2: Define your maintenance tolerance. Be honest: will you seal stone regularly and clean grout weekly? If not, choose low-maintenance materials like quartz and porcelain.
Step 3: Set your budget. Don’t mix high-end and budget materials randomly. A quartz countertop with laminate backsplash looks confused. Choose a tier and stay consistent.
Step 4: Select flooring first. Flooring sets the tone, so pick tile, vinyl, or stone, then choose walls and countertops that coordinate.
Step 5: Choose wall materials. Shower walls need waterproofing priority. Vanity walls can be more decorative. Ensure materials integrate with flooring.
Step 6: Pick countertops last. They tie the room together and get the most attention, so choose something you love that’s also practical.
Step 7: Plan waterproofing and substrate. Before finalizing selections, confirm that each material has the right base. Tile needs cement board. Vinyl needs smooth subfloor. Stone needs reinforced substrate.
Step 8: Review transitions. Plan how each material meets the next so water can’t pool, and make them look intentional.
Choosing bathroom renovation materials requires balancing durability, maintenance, appearance, and budget. The right materials work together as a system, not isolated choices.
The difference between a bathroom that looks good for five years and one that lasts twenty comes down to material selection and installation quality.
Frequently Asked Questions
What materials are best for a bathroom renovation?
The best bathroom renovation materials depend on your priorities and budget. Ceramic and porcelain tile excel in moisture resistance and durability. Quartz and granite countertops resist stains and water damage. Luxury vinyl and ceramic tile are popular flooring choices. For shower walls, large-format tile, natural stone, and acrylic surrounds all perform well. Consider water resistance, maintenance requirements, appearance, and how materials work together in your space.
How do I choose bathroom flooring that can handle moisture?
Prioritize water-resistant flooring for bathrooms. Porcelain tile is highly durable and moisture-resistant with excellent slip resistance. Ceramic tile is affordable and water-resistant but more porous than porcelain.
Luxury vinyl is waterproof, warm underfoot, and easy to maintain. Concrete and cork can work with proper sealing. Avoid standard wood and chipboard, which absorb water and swell.
Ensure proper substrate preparation and waterproofing before installation to prevent moisture damage underneath.
Which bathroom countertop materials are easiest to maintain?
Quartz countertops require minimal maintenance: wipe with mild soap and water, no sealing needed. Laminate is budget-friendly and easy to clean but less durable than stone. Solid surface materials are non-porous and resist stains. Natural stone like granite and marble need regular sealing and are more demanding. Avoid materials with many grout lines in wet areas. Consider your lifestyle and how much routine upkeep you’re willing to do when selecting bathroom countertop materials.
How can I make sure bathroom materials work well together?
Plan your material selection as a coordinated system, not individual choices. Ensure flooring, wall materials, and countertops share compatible design elements like color, texture, and finish. Verify that all materials can handle the same moisture and humidity levels.
Check substrate requirements, some materials need specific waterproofing or underlayment. Consider maintenance demands: if you choose high-maintenance natural stone walls, pair them with low-maintenance flooring. Consult with your renovation contractor about material compatibility and installation requirements.
Table of Contents
Start With Project Goals and a Clear ScopeDefine Menu and Service RequirementsSet Measurable Renovation GoalsCommercial Kitchen…
Table of Contents
Diagnose Your Basement Moisture Before InsulatingIdentifying water intrusion sourcesMeasuring moisture levelsBest Insulation for…