
How to Frame a Basement Bulkhead Around Ducts and Pipes
Last Updated: November 5, 2026
Quick Summary
Basement bulkhead framing involves constructing a boxed-in frame to conceal ducts, pipes, or cleanouts along the basement ceiling. Begin by measuring the outside dimensions of all components, allowing space for insulation and drywall, and marking access points for cleanouts prior to framing.
- Measure the outside faces of all components, not just the duct, before snapping layout lines.
- A duct that measures 203 mm (8 inches) wide can result in a bulkhead that is 356 to 406 mm (14 to 16 inches) wide once framing and drywall are factored in.
- Never completely enclose a cleanout; ensure an access panel or a removable drywall section is incorporated.
- Address basement humidity with a properly sized dehumidifier before relying solely on duct insulation.
- Avoid compressing insulation; ensure sufficient space for its full thickness to maintain its R-value.
Table of Contents
- What a Basement Bulkhead Is and When You Need One
- Tools and Materials for Basement Bulkhead Framing
- Laying Out the Bulkhead and Setting Clearances
- Framing Around Basement Pipes and Cleanouts
- Building the Basement Soffit Framing Around Ductwork
- Insulating Basement Ducts to Prevent Condensation
- Attaching, Squaring and Levelling the Finished Bulkhead
- Booking a Professional Assessment Before You Start Framing
- Frequently Asked Questions
What a Basement Bulkhead Is and When You Need One
A basement bulkhead, often constructed with basement bulkhead framing, is a boxed-in enclosure designed to conceal ductwork, pipes, or cleanouts running along the basement ceiling. Framing one is a common task during basement finishing projects, and it’s also an area where mistakes can easily occur. When executed correctly, it contributes to a clean aesthetic and provides a surface for drywall installation.
Most homeowners require a bulkhead when mechanical systems cannot be integrated into the ceiling joists. Ducts are the most frequent cause, but drain lines and water supply pipes can present similar challenges. The objective is to construct a frame that provides adequate clearance around these components.
- Ducts that extend below the joists
- Drain lines with an unchangeable slope
- Cleanouts that must remain accessible
- Pipes that cannot be rerouted without significant expense
Before commencing any framing, consult your local building codes regarding ceiling height and bulkhead dimensions. Your municipality establishes these regulations, and a brief inquiry can prevent inspection failures.
Tools and Materials for Basement Bulkhead Framing
While extensive workshop facilities aren’t necessary for framing a bulkhead, having the essential tools is crucial. Most of the work involves standard framing equipment. Having all necessary items readily available will ensure the project progresses smoothly.
- Circular saw or miter saw for cutting studs and plates
- Chalk line and level for marking and verifying the layout
- Tape measure and framing square
- Drill and screws for securing the frame
- Pressure-treated lumber for bottom plates where the frame contacts concrete
- Dimensional lumber, typically 38×89 mm (2×4) studs and plates
It’s advisable to purchase a few extra studs, as errors can occur, and a mid-project trip to the store can cause delays.
Laying Out the Bulkhead and Setting Clearances
The bulkhead’s layout is critical to its success. The framing itself is straightforward; however, the decisions regarding its placement, height, and the clearance around mechanicals ultimately determine whether the finished job passes inspection and remains functional.
Start from the mechanicals, not the wall
Measure the external dimensions of every component the bulkhead will enclose, not just the duct. A sloped drain line, a gas line, a water main, and a cleanout cap all contribute to the overall footprint. Add the thickness of the framing on each side, followed by the thickness of the insulation and drywall.
A duct that measures 203 mm (8 inches) wide can easily necessitate a bulkhead that is 356 to 406 mm (14 to 16 inches) wide when insulation, studs, and drywall are accounted for. Snap chalk lines to the final exterior face, then work backward to establish the framing line to ensure the drywall aligns as planned.
Clearance figures that actually matter
There isn’t a single, universal clearance number for a duct within a bulkhead, as requirements vary based on duct type, insulation, and the local authority having jurisdiction. The practical approach is to provide sufficient space for the specified insulation at its full thickness without compression, plus a small air gap for future servicing. For a cleanout, the clearance is dictated by the cap and the wrench required for its operation, not the pipe itself; therefore, measure the cap and allow adequate room for it to be turned.
Verify local building requirements before cutting, as regulations concerning ceiling height, fire blocking, and duct protection differ by jurisdiction. A quick call to the local inspection office is a more cost-effective measure than a failed inspection.
The ceiling-height decision
Headroom is the most common constraint that impacts bulkhead plans. Measure from the finished floor to the lowest point of the proposed frame, not to the joist. If the bulkhead reduces the walking path below the minimum ceiling height permitted by your local codes for the space, you have three options: reroute the duct, use a shallower duct section, or accept that the area beneath the bulkhead is not intended as a walking path and plan the room’s layout accordingly.
Make this decision before framing, as it affects the layout of all subsequent elements.
Mark the access points now
While layout lines are still visible on the ceiling, mark the locations of all cleanouts, valves, dampers, and shutoffs that will be enclosed within the bulkhead. Each of these requires either an access panel or a removable section of drywall. A cleanout sealed behind finished drywall represents the most costly layout error in a basement, as its subsequent exposure necessitates cutting, patching, and repainting.
Transfer these marks to the floor using a plumb line to ensure the access panels are correctly positioned after the frame is erected.
Be cautious: a bulkhead framed too tightly to a duct without accounting for insulation will force compression of the wrap later, negating its insulating purpose.
Framing Around Basement Pipes and Cleanouts
Pipes and cleanouts require particular attention due to their limited movability. Construct the frame to allow access to all cleanouts. Never completely enclose a cleanout; ensure an access panel or a removable section is present so a plumber can reach it without extensive demolition.
For drain lines, maintain clearance between the frame and the pipe itself. Use blocking to support studs away from the pipe, and avoid screwing directly into the pipe. Insulate pipes where necessary, particularly in colder climates, to maintain basement warmth and prevent freezing.
Watch out: a cleanout concealed behind a sealed wall can incur thousands of dollars in repair costs to expose later. Always provide a means of access.
Building the Basement Soffit Framing Around Ductwork
The soffit is the lower section of the box that encases the ductwork. Begin by attaching a top plate to the ceiling joists, then suspend the side walls from this plate.
Work carefully around the duct. If your existing ductwork interferes with your planned finished layout, explore strategies for finishing a basement with ducts before finalizing your framing plan. Ducts are rarely perfectly straight, and minor misalignments can accumulate.
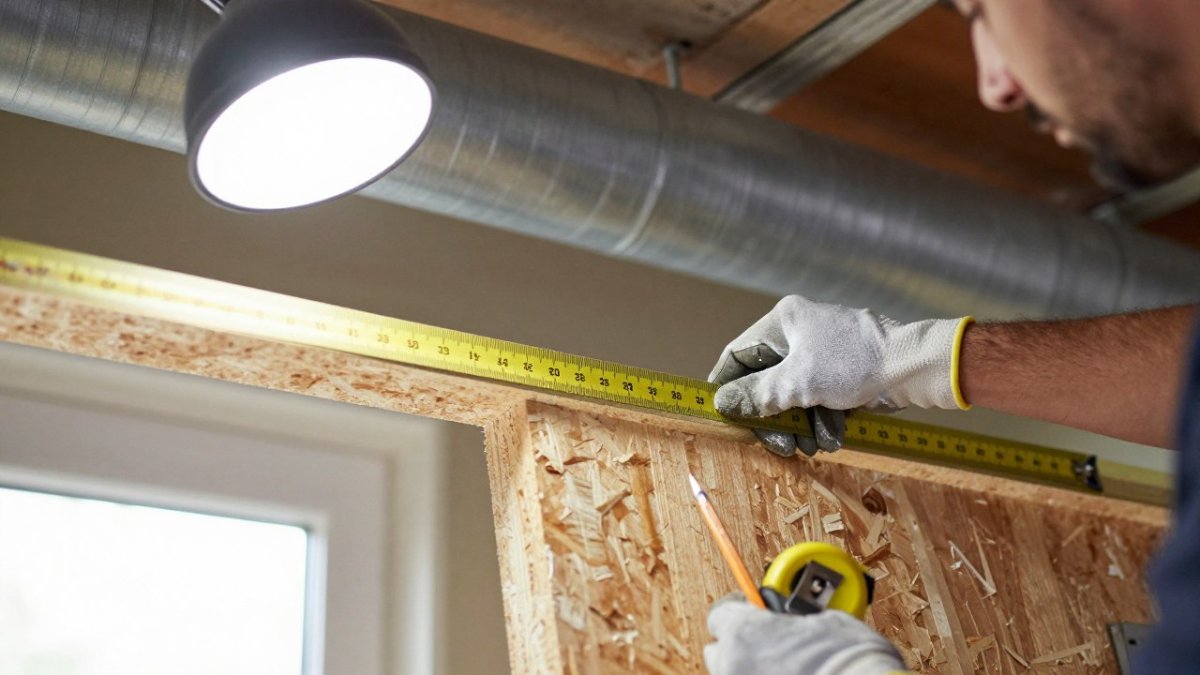
A homeowner wearing work gloves measuring a 38×89 mm (2×4) stud next to an exposed basement ceiling duct, with a tape measure and pencil on a plywood sheet, illustrates this stage in practice.
Insulating Basement Ducts to Prevent Condensation
Condensation on basement ducts is a physical phenomenon, not solely a wrapping issue. Cold supply air lowers the surface temperature of the galvanized steel below the dew point of the surrounding basement air, causing moisture to condense from the air onto the metal. Wrapping the duct raises the surface temperature above the dew point, which halts sweating.
However, if the basement air is already saturated, no amount of wrap will keep every joint completely dry. This is why insulation and humidity control must be addressed concurrently.
Fix the humidity first, then insulate
A basement with high relative humidity will continue to promote moisture condensation, even on insulated ducts, at seams, connection points, and on nearby cold-water pipes. Operate a dehumidifier appropriately sized for the space, seal obvious air leaks around the rim joist and penetrations, and ensure the bulkhead cavity itself is not trapping damp air. A common scenario involves insulating first, only to find the bulkhead remains damp due to an undersized dehumidifier or inadequate air circulation within the cavity.
If the space inside the bulkhead is fully enclosed, incorporate a small vent or plan for the cavity to breathe.
Match the insulation and adhesive to the duct material
Not all wraps are suitable for every duct. The two primary duct types encountered in basements are rigid galvanized steel and flexible (flex) duct, each behaving differently under insulation.
Leave room so the insulation can do its job
Compressed insulation rapidly loses its R-value. Size the bulkhead to accommodate the full thickness of the insulated duct without it touching the framing. If the duct is positioned tightly against a joist, opt for a thinner, high-density insulation product rather than attempting to compress a thicker batt into the gap. Seal insulation seams with foil tape, not just staples, and tape the vapor barrier to the duct jacket at all termination points.
Watch out: fiberglass from older duct wrap can irritate the respiratory system and skin, and disturbed insulation in an older basement may release settled dust and mold spores.
The article highlights several key factors that determine the effectiveness of duct insulation in controlling condensation.
| Factor |
|---|
| What the article says |
| Note |
| Condensation cause |
| Cold supply air drops duct surface below dew point |
| Wrap raises surface temperature |
| Humidity control |
| Run a dehumidifier sized for the space |
| Undersized units leave moisture behind |
| Duct types |
| Rigid galvanized steel and flexible (flex) duct |
| Each needs a suitable wrap and adhesive |
| Insulation thickness |
| Leave room for full thickness, no compression |
| Compressed insulation loses R-value |
| Seam sealing |
| Seal insulation seams with foil tape, not staples alone |
| Tape vapor barrier at every termination |
| Old wrap hazard |
| Fiberglass irritates skin and lungs |
| Wear gloves and a respirator, bag old material |
Attaching, Squaring and Levelling the Finished Bulkhead
Once the frame is constructed, secure it firmly to the ceiling joists and wall plates. Use screws for a more strong connection compared to nails. Before enclosing the frame, verify its squareness and levelness from all angles.
Brace the corners and ensure the bottom edges are aligned. A bulkhead that is not level will reveal every imperfection once drywall is installed. Investing a few extra minutes at this stage can save considerable sanding time later.
When all checks are satisfactory, sheath the frame with drywall, ensuring any access panels remain accessible. Mark the locations of cleanouts and valves to facilitate future maintenance.
Booking a Professional Assessment Before You Start Framing
Some bulkhead installations are straightforward. Others involve complex ductwork, immovable pipes, or permit requirements that seem daunting. If you are uncertain about the project’s scope, a professional assessment can clarify the situation before you begin cutting any lumber.
At Mario Laflamme Contracting & Renovation Ltd, we assist homeowners in planning basement renovations, including bulkhead framing around ducts and pipes. Our basement project services encompass planning, coordination, and quality workmanship, ensuring the job is completed correctly the first time. Explore our basement renovation services to discover how we can support your project planning.
Frequently Asked Questions
How do you frame a bulkhead in a basement?
Start by marking the bulkhead footprint on the ceiling joists and floor, then build a bottom plate and top plate and connect them with vertical studs at 406 mm (16 inches) on centre. Frame the soffit from the ceiling down to the obstruction, check each wall for plumb and square as you go, and sheath the frame before drywall. Confirm your layout with your local building authority before you build.
What materials do you need to frame a basement bulkhead?
Most DIY bulkheads use 38 x 89 mm (2×4) spruce or fir studs, pressure-treated plates where the frame touches concrete, construction screws or nails, a laser level, a chalk line, and a circular saw. Plan for extra lumber to cover waste and corrections. Exact quantities depend on the bulkhead length, height and framing spacing, so measure the full run before buying.
How much clearance should you leave around ductwork in a bulkhead?
Leave enough space around ducts for the insulation you plan to install, and avoid pressing framing directly against the duct. Keep the bulkhead clear of furnace service access and any required clearances to the appliance. Check the manufacturer’s installation instructions and your local code before finalizing the layout.
Ready to get started? Contact Mario Laflamme Contracting & Renovation Ltd for a free consultation and let us help you turn that bulkhead into a finished, valuable part of your home.


Last Updated: November 5, 2026
Quick Summary
The commercial renovation permit process in St. Albert starts by defining your scope, which decides…

Quick Summary
To vet a structural engineer for your home build, first confirm they hold an active professional engineering licence in your province…