
How to Choose Bathroom Fixtures for a Renovation
Table of Contents
- Start With Your Budget and Renovation Priorities
- Follow the Right Bathroom Fixture Selection Order
- Choosing Bathroom Fixture Finishes That Last
- Coordinating Bathroom Fixtures With Your Design
- Water Efficiency, Accessibility, and Long-Term Value
- Common Bathroom Renovation Mistakes to Avoid
- Conclusion: Your Fixture Selection Checklist
- Frequently Asked Questions
Last Updated: October 9, 2026
Start With Your Budget and Renovation Priorities
A bathroom renovation succeeds or fails on the decisions you make before you buy a single tap. Learning how to choose bathroom fixtures for renovation starts with two questions: what can you spend, and what matters most in this room?
Bathroom fixtures are the permanent, plumbed-in elements of the room: the toilet, sink, faucet, shower, bathtub, and the trim that ties them together. They are not furniture you can swap out on a whim.
So plan the money before the mood board.
Setting a Realistic Budget for Bathroom Fixtures
Fixtures usually take the largest share of a bathroom budget, ahead of tile and paint. Pricing depends on size, finish, brand, and availability, so we quote each project individually rather than working from a fixed list. As a rule, set aside a contingency fund on top of your fixture total. Older homes often hide surprises behind the walls, and a cushion keeps the project moving instead of stalling.
Where to Splurge and Where to Save
Spend on the parts you touch and use daily:
- Faucets and shower valves: cheap cartridges drip and fail early
- The toilet: it runs every single day
- Showerheads: a small upgrade you notice constantly
Save on the parts nobody touches:
- Decorative trim and towel bars
- A second sink if your household rarely needs one
- Designer tile behind the vanity
Ask your contractor to price fixtures at two or three quality tiers before you commit. Seeing the gap between builder-grade and mid-range options makes the splurge-versus-save call much easier.
Follow the Right Bathroom Fixture Selection Order
The right bathroom fixture selection order is fixed elements first, then the pieces that depend on them. Pick the toilet and shower before the faucet, and the faucet before the mirror.
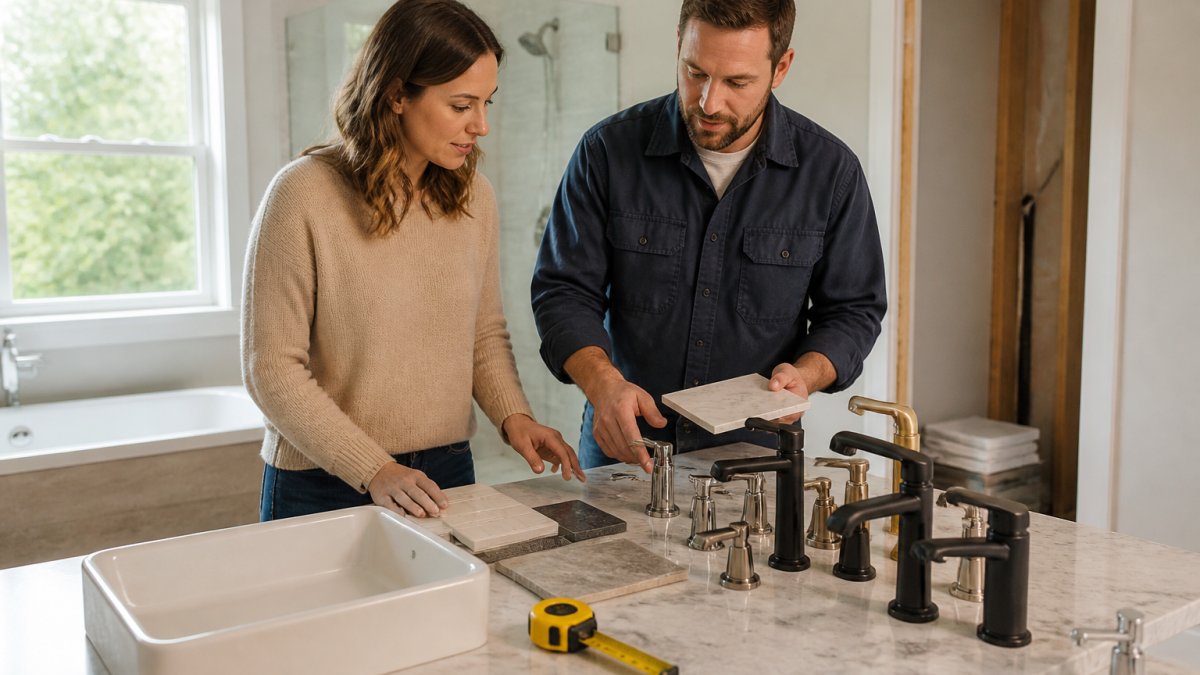
Step 1: Measure Your Space and Check Rough-In Dimensions
Start with a tape measure, not a catalog. Write down the room’s length and width, the ceiling height, and the position of every drain, supply line, and vent.
Then check the rough-in dimensions:
- Toilet rough-in: the distance from the finished back wall to the center of the floor drain, usually 10, 12, or 30.5, 35.6, or 40.6 centimeters
- Vanity width: leave clearance on each side so doors and drawers open fully
- Shower or tub footprint: confirm the alcove size before shopping
Matching a new fixture to the existing rough-in avoids moving plumbing, which is one of the biggest hidden costs in a renovation.
Step 2: Choose the Fixed Elements First
Lock in the pieces that are hardest to move later: the bathtub or shower base, the shower valve, and the toilet. These set the plumbing layout, the tile lines, and the floor plan. Once they are chosen, everything else coordinates around them.
Step 3: Select Vanity, Sink, and Faucet
Now the visible layer. Match the vanity width to your measurements, choose a sink that suits how you use the room, and pick a faucet that fits the sink’s hole configuration. A single-hole faucet needs a different vanity top than a widespread set. Get this order right and the install is straightforward.
Choosing Bathroom Fixture Finishes That Last
Finish choice is where style meets durability, and the two do not always agree. Chrome, brushed nickel, and brass are the three finishes you will see most often, and each behaves differently in a humid bathroom. What most guides skip is why finishes fail and how to read a finish spec before you buy.
How Finish Durability Actually Works
A faucet or shower trim is usually a base metal (brass or zinc alloy) with a decorative layer on top. That layer is what you are really buying:
- Electroplated chrome is hard, bright, and the most scratch-resistant of the common finishes. It is also the cheapest to produce, which is why it dominates builder-grade stock.
- Brushed or satin nickel is typically a plated finish with a brushed texture. The texture hides water spots and fingerprints, but the brushed grain can trap hard-water minerals if you do not wipe it down.
- PVD (physical vapor deposition) finishes are a harder, more wear-resistant coating applied over the base metal. Many manufacturers use PVD for brass, matte black, and gunmetal tones because it resists tarnishing and abrasion better than a standard lacquer or plated finish. If a finish is labeled PVD, that is a durability signal, not just a color name.
Matching Finish to the Room
- Chrome: shiny, affordable, and easy to wipe clean, but it shows water spots and fingerprints. Best in high-use bathrooms where you will wipe surfaces often.
- Brushed nickel: hides smudges well and suits most design styles, though it can cost more. A safe middle ground for family bathrooms.
- Brass: warm and long-lasting, with a lived-in patina over time, but it needs more care. Lacquered brass keeps its shine until the lacquer wears; unlacquered brass ages intentionally.
The practical rule: match the finish across every visible fixture. A chrome faucet beside a brass showerhead looks like a mistake, not a design choice.
Care, Warranty, and Replacement Parts
Finish care is simple but easy to get wrong:
- Wipe fixtures dry after use in hard-water areas to prevent mineral spotting.
- Avoid abrasive cleaners, scouring pads, and ammonia-based products, which dull plated and PVD surfaces.
- Check the warranty terms, many manufacturers cover the finish separately from the mechanical parts, and some exclude finish wear entirely. A “lifetime” finish warranty often has conditions about cleaning products.
Do not mix finishes by accident. Order all your bathroom fixture finishes from the same supplier and check the finish names match exactly. “Brushed nickel” from two brands can arrive looking like two different metals, and a PVD brass will not match a lacquered brass, even if both are called “brass.”
Ask the supplier for the finish warranty in writing and confirm the cartridge part number before you buy. Those two details separate a fixture that lasts from one you replace in three years.
Coordinating Bathroom Fixtures With Your Design
Coordinating bathroom fixtures means tying the metal, shape, and scale of each piece to the rest of the room. A large vanity in a small bathroom crowds the space. A modern square faucet clashes with a traditional vanity.
A quick way to check your coordination:
| Element | What to Match | Why It Matters |
|---|---|---|
| Finish | Same metal across all fixtures | Creates a cohesive look |
| Style | Modern with modern, traditional with traditional | Avoids visual clash |
| Scale | Fixture size vs. room size | Keeps the room balanced |
| Shape | Rounded or squared edges | Ties the design together |
Bring your tile and paint samples to the fixture showroom. Seeing the metal against the actual finishes stops most coordination regrets before they happen.
Water Efficiency, Accessibility, and Long-Term Value
Efficiency and accessibility are the two angles most renovation guides skip, and they are the ones that affect your bills and your future. This section covers what to look for on the label, what the numbers mean, and how to plan a bathroom that works for every stage of life.
Water Efficiency: Read the Label, Not the Marketing
Water use in a bathroom comes down to three fixtures, and each has a standard you can check before buying:
- Toilets: Modern high-efficiency toilets use around 4.8 liters per flush, and dual-flush models use even less on the light cycle. Older toilets can use 13 liters or more per flush, so replacing one is often the single biggest water saving in a bathroom renovation.
- Showerheads: Standard flow is capped at 9.5 liters per minute in most North American models, and low-flow versions run around 7.6 liters per minute or lower. A lower flow rate saves water but can feel weak; look for models that use aeration or a wider spray pattern to compensate.
- Faucets: Bathroom faucets typically run at 5.7 liters per minute or less. Aerators are the mechanism that restricts flow while maintaining pressure, and they are cheap to replace if you want to lower an older faucet’s rate.
Look for a WaterSense-style efficiency label on the packaging. In Canada, efficiency labeling and minimum flow standards are set through the federal energy-efficiency regime and provincial plumbing codes, so confirm the model meets the standard in your province before ordering. Your contractor can verify the model number against the applicable standard.
Accessibility and Aging-in-Place
Accessibility is not just for people with mobility issues today; it is about the bathroom still working in ten or twenty years. The design moves are specific:
- Comfort-height toilets sit around 43 to 48 centimeters from floor to seat, which is easier to rise from than a standard 38-centimeter height.
- Lever handles on faucets and shower valves are simpler to operate than knobs, and they work with a closed fist or wet hands.
- Grab bar reinforcement must be installed before the walls close. Blocking or plywood backing behind the shower and toilet walls lets you add grab bars later without tearing out tile. This is the single most important accessibility step in a renovation.
Canada’s national building code and provincial codes set accessibility expectations for many renovations, and requirements vary by project type and province. Your contractor can confirm what applies to your specific renovation.
Efficiency and accessibility are cheapest to add during the renovation, not after. Blocking for grab bars, a comfort-height toilet, and a low-flow showerhead cost little now and save money and hassle later.
Common Bathroom Renovation Mistakes to Avoid
Most bathroom renovation mistakes trace back to buying before measuring. Here are the ones we see most often, and how to sidestep them.
- Ordering a toilet that does not match the rough-in. Measure the drain distance first.
- Skipping the plumbing check. Old pipes and venting can force layout changes.
- Mixing finishes. Confirm every fixture shares the same finish name.
- Forgetting ventilation. A proper exhaust fan prevents mold and moisture damage.
- Buying the faucet before the sink. The hole configuration decides what fits.
- No contingency fund. Surprises behind the walls are common in older homes.
Measure, sequence, and match. If you do those three things in order, you avoid nearly every expensive fixture mistake.
Conclusion: Your Fixture Selection Checklist
Use this checklist before you buy anything:
- Set your total fixture budget plus a contingency fund
- Measure the room and record every rough-in dimension
- Choose the tub, shower, and toilet first
A bathroom renovation is a big investment, and the fixture choices you make now will shape how the room looks and works for years. Mario Laflamme Contracting & Renovation Ltd handles bathroom remodels from first measurement to final install, with professional project management and a focus on quality craftsmanship that protects your property’s value. Get started with Mario Laflamme Contracting & Renovation Ltd and book your free consultation for a bathroom that works as well as it looks.
Frequently Asked Questions
What should I choose first when selecting bathroom fixtures?
Start with fixed elements that depend on plumbing rough-in: the toilet, shower, and bathtub. These determine drain locations and supply lines. Once those are set, choose the vanity, sink, and faucet. Finishes and hardware come last since they are easiest to swap. This order prevents costly rework and keeps your bathroom fixture selection order aligned with the trades schedule.
How do I choose a finish for bathroom fixtures?
Chrome remains the most affordable and easiest to clean. Brushed nickel hides water spots well and suits most designs. Brass adds warmth but costs more and needs occasional polishing. Match your faucet, showerhead, and cabinet hardware for a cohesive look, but you do not need every piece to be identical. Coordinating bathroom fixtures by finish family works better than matching exact models.
Should bathroom fixtures match throughout the room?
They should coordinate, not necessarily match. A consistent finish across the faucet, shower trim, and hardware creates visual calm. Mixing two finishes, such as chrome and brushed nickel, can work if one dominates. Avoid three or more finishes in a small bathroom. Coordinating bathroom fixtures by tone and shape matters more than brand consistency.
What are common mistakes to avoid when renovating a bathroom?
Ordering fixtures before checking rough-in dimensions is the most expensive mistake. Others include ignoring water efficiency ratings, skipping a contingency fund for hidden plumbing issues, and choosing a freestanding tub that blocks the door swing. Also avoid buying non-returnable clearance items before confirming they fit. Measure twice, confirm your selection order, and keep a 15 to 20 percent contingency for surprises behind the walls.
Table of Contents
Diagnose Your Basement Moisture Before InsulatingIdentifying water intrusion sourcesMeasuring moisture levelsBest Insulation for…
Table of Contents
1. Optimize Your Small Kitchen Layout Ideas for Better FlowGalley Layouts for Narrow SpacesL-Shaped ConfigurationsSingle-Wall…