
Common Exterior Renovation Mistakes to Avoid in 2026
Table of Contents
- Why Exterior Renovation Projects Go Wrong
- Your Exterior Renovation Planning Checklist
- Setting a Realistic Exterior Renovation Budget
- Getting the Exterior Renovation Project Order Right
- Siding Replacement Mistakes That Cost You Later
- Weatherproofing, Drainage, and Moisture Management
- Hiring Contractors and Protecting Yourself in Writing
- Conclusion
- Frequently Asked Questions
Last Updated: October 17, 2026
Why Exterior Renovation Projects Go Wrong
Most exterior renovation projects go wrong before a single tool comes off the truck. The mistakes happen in the planning stage: unclear scope, skipped permits, and budgets built on hope rather than real numbers.
Exterior renovation is the process of repairing, replacing, or upgrading the outside surfaces and structures of a home, including siding, roofing, windows, doors, porches, and fencing.
The stakes are high. A rushed exterior project can trap moisture behind new siding, void a manufacturer’s warranty, or force a second crew to undo the first crew’s work.
The costliest exterior mistake is starting demolition before the scope is written down. Once walls are open, every “while we’re in there” addition lands on your invoice with no chance to compare quotes.
Your Exterior Renovation Planning Checklist
A solid exterior renovation planning checklist starts with scope and permits, not paint colors. Work through these steps before you request a single quote:
- Write down what is failing and what you want improved
- Photograph every problem area from multiple angles
- Confirm zoning and permit requirements with your municipality
- Set a budget with a contingency fund built in
- Decide the order of work across trades
- Collect written quotes from licensed contractors
- Review warranty terms for materials and labor
Define the Project Scope Before You Call Anyone
Scope is the single biggest driver of cost overruns. A vague request like “fix the siding” invites wildly different quotes, because each contractor guesses at what you mean. Walk the exterior and note specific failures: cracked boards, soft spots, peeling paint, loose flashing, and gaps at windows.
Then separate must-fix items from nice-to-have upgrades. Repair work protects the house; cosmetic upgrades raise curb appeal. Mixing them in one undifferentiated list makes it impossible to compare bids or trim costs later.
Check Permits and Local Building Codes Early
Permit requirements vary by municipality, and exterior work often triggers them. Structural changes, new decks, fencing above a certain height, and some roofing and siding work may need approval before work begins. Skipping a permit can force removal of finished work or stall a home sale.
Call your local building department before signing anything. Ask two questions: does this work need a permit, and what inspections are required? Get the answer in writing if you can. A contractor who shrugs off permits is a contractor to walk away from.
Setting a Realistic Exterior Renovation Budget
An exterior renovation budget fails when it covers only the visible work. Set your budget around three buckets: materials, labor, and contingency.
A common pattern among experienced renovators is to hold back a meaningful share of the total for unknowns, often in the range of 10 to 20 percent for exterior work on older homes, and closer to 10 percent for newer homes with documented maintenance history.
Budget line items that homeowners routinely forget on exterior projects:
- Permit fees and inspection costs. These vary by municipality and are rarely included in a contractor’s base quote.
- Temporary protection and site access. Scaffolding, dumpsters, and landscape protection add cost on multi-story or tight-lot homes.
- Disposal and recycling fees. Old siding, roofing, and windows carry tipping fees that scale with project size.
- Repair allowances for hidden damage. Rot at rim joists, failed sheathing, and deteriorated flashing are common discoveries once cladding comes off.
- Replacement of ancillary items. Trim, fascia, soffit, and caulking often need replacement once adjacent work is opened.
- Paint and finish costs. These are frequently quoted separately from siding or trim installation.
Ask each contractor how they handle hidden damage discovered mid-project. The best answers include a written change-order process, photo documentation, and a pause for your approval before extra work proceeds.
Evaluate Materials on Lifecycle Cost, Not Just Sticker Price
The cheapest material is rarely the least expensive over time. Compare products on expected service life, maintenance requirements, and repair cost, not just the initial quote.
A practical way to compare options is to estimate the annualized cost: divide the installed price by the expected service life in years, then add estimated annual maintenance.
Maintenance also belongs in the budget. Exterior surfaces need periodic cleaning, caulking renewal, paint touch-ups, and gutter clearing. A material that needs repainting every few years carries a recurring cost that a factory-finished product may not.
Separate Must-Fix From Nice-to-Have
Repair work protects the house; cosmetic upgrades raise curb appeal. Mixing them in one undifferentiated list makes it impossible to compare bids or trim costs later. Price the must-fix items first, then decide which upgrades fit within the remaining budget. If bids come in high, you can defer cosmetic work without compromising the weather-tightness of the assembly.
Getting the Exterior Renovation Project Order Right
Exterior renovation project order matters more than most homeowners expect. Trades that work on the same wall must be sequenced so each one’s work is not destroyed by the next. Get the order wrong and you pay twice.
A practical sequence looks like this:
- Structural repairs and framing corrections
- Roofing and flashing, so water sheds correctly from the top down
- Windows and doors, sealed into the corrected openings
- Siding and trim, installed over proper house wrap and flashing
- Porches, railings, and fencing
- Painting and final finishes
- Landscaping and site cleanup
Roofing before siding is not arbitrary. Water runs downhill, and flashing details at rooflines and window heads must be in place before siding covers them. Reversing that order traps moisture and voids warranties.
Siding Replacement Mistakes That Cost You Later
Siding replacement mistakes usually hide behind the boards. The visible result looks fine for a season, then problems surface: bubbling paint, soft spots, and water staining at the seams.
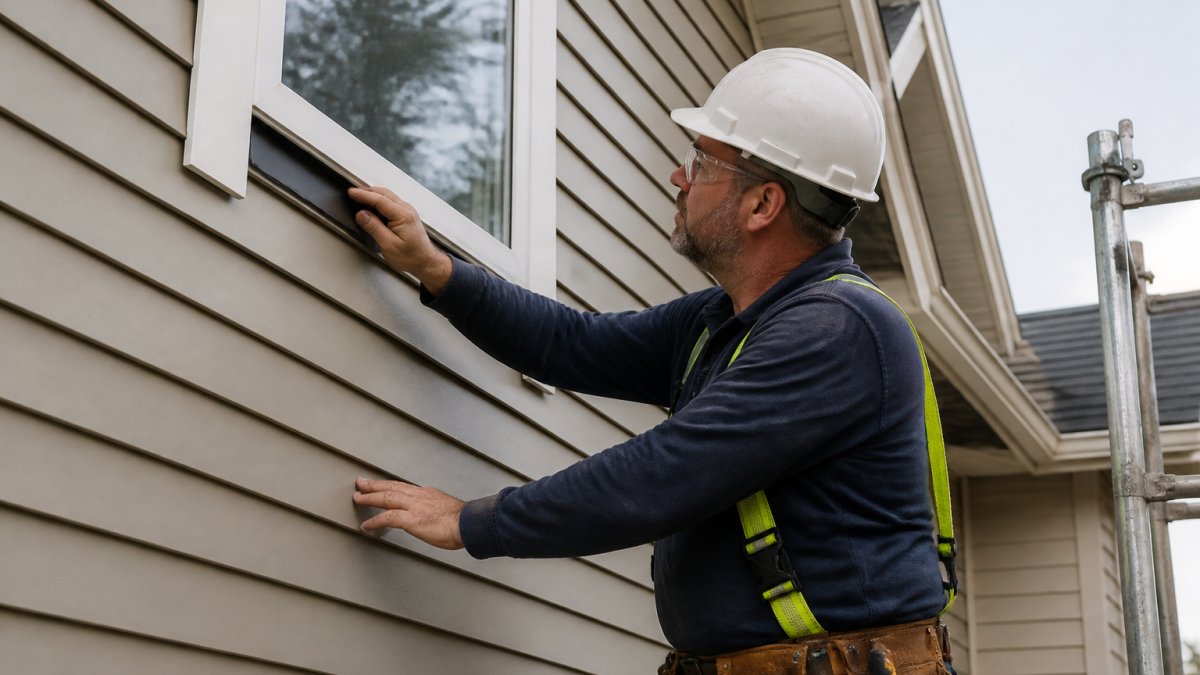
The biggest offenders:
- Skipping surface preparation. Rot, loose sheathing, and old fasteners must be repaired first.
- Ignoring moisture barriers. House wrap and flashing keep water out of the wall assembly.
- Choosing cheap materials for a harsh climate. Material selection should match local weather demands.
- Poor workmanship at seams and corners. Gaps and misaligned joints invite water in.
- No ventilation behind the cladding. Trapped moisture rots sheathing from the inside.
Durability comes from the assembly, not the panel. A premium board installed over a bad wall fails faster than a mid-range board installed correctly.
Weatherproofing, Drainage, and Moisture Management
Moisture management is where exterior renovation succeeds or fails, and it is the angle most guides skip. Water is patient. It finds every unsealed penetration, every backwards lap, and every low spot that holds it against the house.
Three details deserve extra attention:
- Flashing at rooflines, windows, and doors. Metal flashing directs water away from seams rather than into them.
- Grading and drainage. Soil should slope away from the foundation, and downspouts should discharge well clear of the wall.
- Vapor and air sealing. A tight building envelope keeps warm interior air from condensing inside cold exterior walls.
Energy efficiency ties directly to this work. Proper insulation, air sealing, and moisture control together improve building-envelope performance, which affects comfort and heating costs through the colder months. Treat weatherproofing as structural, not cosmetic.
Hiring Contractors and Protecting Yourself in Writing
Hiring the wrong contractor is the mistake that undoes every good decision before it. The fix is boring and effective: verify licensing and insurance, check references for similar exterior projects, and put everything in a written contract.
Verify Licensing, Insurance, and Coverage Before You Sign
Licensing requirements for contractors vary by province and municipality, and exterior work often falls under specific trade certifications. Ask for the contractor’s license or registration number and confirm it is current with the appropriate provincial or municipal authority.
Insurance is equally important. Request a certificate of insurance showing general liability coverage and, where required, workers’ compensation coverage for the crew. General liability protects you if the crew damages your home or a neighbor’s property; workers’ compensation protects you if a worker is injured on your property.
Put the Scope, Schedule, and Payment Terms in Writing
What the contract should cover:
- Detailed scope of work with materials specified by brand and grade
- Payment schedule tied to completed milestones, not calendar dates
- Change-order process with written approval required
- Start and completion dates with a weather-delay clause
- Warranty terms for both labor and materials
- Cleanup and site protection responsibilities
- Proof of permits and inspection responsibilities
Ask for references you can actually call, ideally homeowners who had comparable work done on a similar house age and style. Then ask those references the hard questions: did the crew show up, did the final bill match the quote, and would you hire them again?
Understand Lien Risk and Warranty Documentation
In many jurisdictions, subcontractors and suppliers who are not paid can register a lien against your property, even if you have already paid the general contractor.
Warranty documentation matters as much as the warranty itself. Collect manufacturer warranties for materials, the contractor’s labor warranty in writing, and the maintenance requirements that keep both valid. Many exterior warranties are voided by improper installation, inadequate ventilation behind cladding, or failure to perform required maintenance.
A written contract with a clear change-order process is your best protection against surprise costs. Verbal promises about “working something out” rarely survive a mid-project discovery.
Coordinate Trades and Protect the Site
Exterior projects involve multiple trades working on the same walls. Confirm in writing who is responsible for sequencing, who provides site protection, and who handles cleanup between stages. A contractor who coordinates trades well will schedule roofing, windows, siding, and painting so each stage is water-tight before the next begins.
Ask how they protect landscaping, walkways, and neighboring property during the work, and confirm that debris removal is included in the price rather than billed as an extra.
Conclusion
Exterior work rewards patience and punishes shortcuts. Get the scope, permits, budget, and sequence right, and the rest of the project has a foundation to stand on.
If you would rather hand the planning to people who do this every day, Mario Laflamme Contracting & Renovation Ltd handles exterior upgrades from siding and roofing to fencing, along with full project management for custom builds and commercial spaces.
Frequently Asked Questions
What is the correct order for an exterior renovation?
Work from the top down and from the structure outward. Roofing and flashing come first so water sheds correctly, then windows and doors, then siding and trim, and finally painting, caulking, and landscaping. Getting the exterior renovation project order wrong means trades undo each other’s work. For example, installing siding before new windows go in forces the siding crew to cut back finished walls, which adds cost and creates leak points.
Should you replace siding or windows first?
Windows first, in most cases. New windows need proper flashing and framing tied into the wall assembly, and siding goes over that. If you replace siding first and windows later, the window crew has to cut into new siding and re-flash the openings, which risks moisture problems and visible patchwork. If both are due within a few years, doing them together in the right sequence saves money on labor and scaffolding.
How can you avoid going over budget on an exterior renovation?
Build a contingency fund into the exterior renovation budget from day one, typically 10 to 20 percent of the project total for older homes where hidden rot or outdated wiring is likely. Get a written scope with line items, not a lump-sum quote, so you can see what changes cost. Ask your contractor how they handle surprise discoveries in writing before work starts, and hold off on cosmetic upgrades until the structural and moisture work is done.
What should you check before starting an exterior renovation?
Confirm permit requirements with your local authority, verify the contractor’s license and liability insurance, and get a written contract that names materials, timelines, payment schedule, and warranty terms. Walk the exterior with your contractor to spot rot, drainage problems, and failing caulking before demolition starts. Also check whether your home insurance covers renovation work in progress, and ask for references from similar projects you can actually call.
Your exterior is the part of your home that takes the hardest beating, and one wrong sequence or skipped permit can turn a repair into a rebuild. Mario Laflamme Contracting & Renovation Ltd brings comprehensive exterior renovation services, from siding and roofing to fencing, backed by professional project management that keeps scope, budget, and trades coordinated from start to finish. Book a free consultation and get a clear plan before the first board comes off.

Table of Contents
Diagnose Your Basement Moisture Before InsulatingIdentifying water intrusion sourcesMeasuring moisture levelsBest Insulation for…

Table of Contents
1. Optimize Your Small Kitchen Layout Ideas for Better FlowGalley Layouts for Narrow SpacesL-Shaped ConfigurationsSingle-Wall…