
Signs You Need New Roof Siding
Table of Contents
- What Is Roof Siding and Why Does It Fail?
- 7 Clear Signs You Need New Roof Siding
- Signs of Water Damage Under Siding
- How to Inspect Your Roof and Siding Yourself
- Roof Replacement Cost Estimate: What to Expect
- When to Call Exterior Renovation Contractors
- Conclusion
- Frequently Asked Questions
Last Updated: September 8, 2026
Your roof and siding work as a team, forming the first line of defense against rain, snow, and wind. When one starts failing, the other often follows, which is why spotting the signs you need new roof siding early can save you from costly structural repairs. Below, we’ll walk through the warning signs, how to inspect them yourself, and when to bring in exterior renovation contractors.
Many homeowners mistake cosmetic wear for structural damage, but compromised siding is a direct pathway for water infiltration that threatens your framing, insulation, and foundation.
What Is Roof Siding and Why Does It Fail?
Roof siding, commonly called exterior cladding, is the protective skin over your home’s framing and moisture barrier. It bears the brunt of every hailstorm, freeze-thaw cycle, and summer UV blast. Most siding materials last 20 to 40 years, but installation errors, poor attic ventilation, or impact damage can shorten that window. Information on energy-efficient building products
Thermal expansion is a leading culprit. When panels heat up and contract overnight, they stress fasteners and joints, causing curling, buckling, and gaps that let water behind the cladding. Trapped moisture attacks the underlayment and wood sheathing, setting the stage for rot you can’t see from the curb.
7 Clear Signs You Need New Roof Siding
The most reliable signs you need new roof siding are visual, but you must look up close. Walk the perimeter and examine walls section by section, focusing on afternoon-sun areas and wind-funnel corners. Do this twice a year, in spring and fall.

Curling, Buckling, or Warped Panels
Curling edges and buckled panels are the most obvious signs you need new roof siding, indicating the material has lost dimensional stability. A panel lifting or bowing means the locking mechanism has failed, creating an open channel for wind-driven rain. A single panel can be re-secured, but warping across multiple sections calls for replacement.
Cracks, Rot, and Soft Spots
Press gently on the siding near bottom edges where moisture collects. Any give or sponginess means rot is working through the sheathing behind the cladding. Vertical cracks or pitting are water entry points even if small. Soft spots always signal active water damage that has compromised the wood underneath.
Water Stains and Interior Damage
Discoloration on interior walls or ceilings often originates from exterior cladding failure, not plumbing. Stains low on a wall or near exterior corners suggest siding is letting moisture through. Peeling paint or bubbling wallpaper means moisture has migrated through insulation. These are the most urgent signs you need new roof siding because they confirm the barrier is breached.
Signs of Water Damage Under Siding
Signs of water damage under siding are not always visible from outside. A musty odor near exterior walls or a sudden rise in heating and cooling bills from wet insulation are telling clues. On the exterior, a white, chalky residue indicates minerals leaching from deteriorating wood sheathing.
Check window and door frames. Soft, cracked, or dark-streaked trim means water is running down inside the wall cavity. In severe cases, siding panels bulge from swollen framing. If you detect these issues, the moisture barrier and underlayment have likely failed.
How to Inspect Your Roof and Siding Yourself
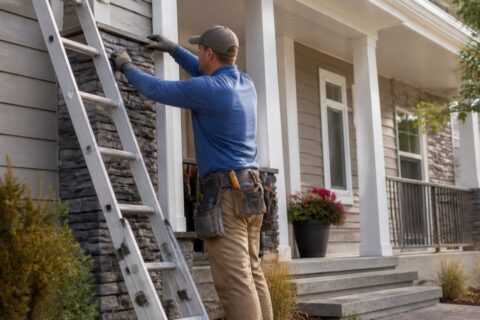
A DIY inspection happens from the ground, windows, and attic, not the roof, where injuries and voided warranties can occur. It takes about 45 minutes and aims to identify zones needing a professional’s eyes.
The Ground-Level Method: What You Can See Without a Ladder
Stand 10 to 15 feet back and scan the roofline for a sagging ridge, a visible dip suggesting the ridge board or deck is failing. Then examine siding in sections from the bottom up, using binoculars to inspect roofline, chimney flashing, and valleys.
The most revealing zone is the bottom two feet of each wall, where splash-back concentrates. Press panels gently; any give means loose fasteners or soft sheathing. Use a plastic probe or flathead screwdriver; if the tip sinks in more than a quarter inch, you have active rot. HUD guidelines on home inspection
Climate-Specific Wear Patterns: What to Look for in Your Region
In snow-heavy and freeze-thaw regions:
- Look for ice dam staining on the siding near the eaves, dark, vertical streaks that run down from the roofline. These indicate water is backing up under the shingles and running down the wall behind the siding.
- Check for cracked or split shingles at the bottom row, where ice and snow sit longest. Freeze-thaw cycles expand water in the cracks, widening them each season.
- Inspect the siding panels at the corners where snow drifts pile up. Prolonged contact with snow keeps the siding wet for months, accelerating rot at the bottom edge.
- The urgency here is high: a roof that leaks during a January thaw is actively soaking your insulation, and the repair window is narrow before the next storm.
In hot, high-UV regions:
- Look for curling shingle edges and granule loss in the gutters. UV exposure degrades the asphalt, causing the shingles to dry out, curl, and lose their protective granules.
- Check the siding for fading, chalking, or a powdery residue on the surface. This is the material breaking down from UV exposure, and it means the panel is losing its moisture resistance.
- Pay attention to the west and south-facing walls, which take the most sun. Thermal expansion is most aggressive there, so buckling and warping will appear first on those elevations.
- The urgency here is moderate: UV damage is progressive, but it does not cause immediate interior leaks. It does, however, shorten the remaining lifespan of the material, so a professional assessment within the next season is wise.
The Garden Hose Test: Finding Leaks You Cannot See
A garden hose is an underused inspection tool. To test the siding-to-roof joint, spray water at the intersection from the ground, starting low and working upward, while a helper watches the interior wall for darkening or dripping. Wait five minutes between sections, as water travels laterally behind siding.
This test is especially useful around windows, doors, and chimney flashing. Spray each opening for three to four minutes and check interior trim for moisture. Water inside confirms the moisture barrier has failed.
The Attic Check: The Only Roof Inspection You Should Do Indoors
If you have safe attic access, this is the most valuable inspection you can perform. On a dry day, look for:
- Daylight visible through the roof boards, this means gaps in the deck or missing underlayment.
- Dark stains on the underside of the deck, which indicate past or active leaks.
- Wet or compressed insulation, if the insulation is matted down or feels damp, water has been getting in.
- Rusty nail points poking through the deck, which suggest chronic moisture exposure.
Do not walk on unfloored joists; stay on trusses or the walkway with a flashlight. Any of these signs confirms the roof barrier is compromised.
What to Document and How to Use It
Take photos of every issue and note the location (e.g., “west wall, third panel from the corner, bottom edge”). This lets you track progression between inspections and gives a contractor a precise starting point for a more accurate estimate.
Do the garden hose test in the fall before the ground freezes. If you find a leak, you have a narrow window to repair it before snow cover makes the work impossible. Finding a leak in January means waiting for a thaw, and paying for interior water damage in the meantime.
A DIY inspection is a screening tool, not a substitute for professional assessment. If you find curling on more than one elevation, soft spots near the bottom edge, or daylight in the attic, call a contractor to determine whether damage is isolated to siding or has reached the sheathing and framing.
Roof Replacement Cost Estimate: What to Expect
A roof replacement cost estimate is a range shaped by footprint, pitch, labor rates, and material class. Full asphalt shingle replacements on a 1,500 to 2,000 square foot home vary in cost; metal or cedar can be significantly more. Only a site assessment measuring your roof planes and deck condition gives a budgetable number.
Rather than asking “What does a roof cost?”, ask “What does this specific failure require?” That reframing is the core of a repair versus replace decision matrix.
The Repair vs. Replace Decision Matrix
Use the following criteria to sort whether you are looking at a targeted fix or a full replacement. If you answer “yes” to two or more questions in the replacement column, a full tear-off is the cost-effective path.
| Question | Repair is sufficient | Replacement is mandatory |
|---|---|---|
| How old is the roof? | Less than 15 years (asphalt) | More than 20 years (asphalt) or past the manufacturer’s warranty period |
| How widespread is the damage? | A single valley, one flashing point, or fewer than 10% of shingles affected | Damage spans multiple roof planes or affects more than 30% of the surface |
| Is the deck compromised? | Sheathing is dry and solid under the damaged area | Soft spots, rot, or sagging detected in the deck during inspection |
| Are there active leaks? | No interior staining; issue is cosmetic or isolated | Water stains on ceilings or walls in more than one room |
| What is the underlayment condition? | Underlayment is intact and only the top layer is worn | Underlayment is brittle, torn, or missing in sections |
A common pattern is patching an older roof multiple times, when replacement might be more cost-effective. The third repair is just deferred replacement with extra steps. If your roof is past its lifespan and leaks more than once every two years, you are subsidizing its failure. Advice on roof repair vs. replacement
Why the Cheapest Estimate Is Usually the Most Expensive One
When collecting estimates, compare line items, not just the bottom line. A credible estimate itemizes:
- Tear-off and disposal of the existing shingles
- Inspection and replacement of any rotted decking (with a stated allowance per sheet of plywood)
- New ice and water shield in valleys and along eaves
- New step flashing at walls and chimney cricket installation where needed
- Proper ventilation upgrades (ridge vent, intake vents) if the current system is undersized
- Manufacturer-certified installation to keep the shingle warranty valid
Estimates that skip these items are deferred problems. A low bid omitting new flashing or ice shield may lead to leaks. Ice and water shield along the eaves is crucial in many climates.
The Siding Connection No One Mentions
The condition of your siding changes the roof replacement estimate. If siding is failing, the contractor must protect or remove sections to access the roof edge and re-flash the wall-to-roof intersection. Rotted siding exposes sheathing repair needs, adding cost. Replacing the roof while siding leaks lets water saturate the new deck from the side, undoing your investment within a season.
Ask your contractor for a combined exterior assessment before committing to a roof replacement. If siding is nearing the end of its lifespan, doing both together, even if siding could wait, can offer efficiencies in combined labor, as scaffolding, tear-off, and disposal are shared.
Do not choose a roof replacement estimate based on price alone. A difference between two bids can often reflect the inclusion of proper ice and water shield, new flashing, or deck replacement allowance. The cheapest bid that skips these items may cost you more in the long run.
Before signing, ask the contractor to walk through the estimate line by line and explain what happens if they find rotted decking mid-project. A contractor who cannot articulate that contingency is giving you a starting point for a change order, not an estimate.
When to Call Exterior Renovation Contractors
If your inspection reveals widespread curling, multiple soft spots, or water damage under siding, call exterior renovation contractors for a professional evaluation. They can determine whether the issue is isolated to siding or extends to sheathing and moisture barrier.
Working with a team that handles both roofing and siding, like Mario Laflamme Contracting & Renovation Ltd, can offer a practical advantage. Coordinating two separate crews can be difficult, and scheduling gaps may leave your home exposed. A single contractor can help ensure flashing, underlayment, and moisture barriers are installed as one continuous system, which can be a reliable way to prevent leaks.
Do not ignore a single curled panel or small water stain assuming it is cosmetic. Water that gets behind siding travels laterally and can rot a surprising amount of framing before it becomes visible inside your home. The cost of repairing rotted sheathing is often several times higher than replacing the siding that should have protected it.
The repair-or-replace decision comes down to damage extent and material age. If damage is limited to a few panels and siding is less than halfway through its lifespan, targeted repairs may suffice. If siding is older or damage spans multiple sections, replacement is more cost-effective, as it restores the moisture barrier’s integrity.
Conclusion
Your home’s exterior is a system, and the signs you need new roof siding are its way of telling you it is breaking down. Catching these signs early protects your structural integrity, insulation performance, and resale value.
At Mario Laflamme Contracting & Renovation Ltd, we help homeowners assess their full exterior, from roof deck to siding panels, so you know what needs attention and what can wait. Our team handles both roofing and exterior cladding, coordinating the work as one cohesive project. If your inspection uncovered any warning signs, contact us for a free consultation.
Frequently Asked Questions
How do you know when to replace siding?
Replace siding when you notice widespread curling, buckling, or cracking that affects more than a few panels. Soft spots or visible rot when pressed, frequent paint peeling despite repainting, and signs of water damage under siding like staining or mold are also clear signals. If your siding is over 20 years old and showing any of these issues, a professional inspection can confirm whether replacement is the right call.
Should siding touch the roof?
No. Siding should never touch the roofline directly. Building science requires a gap of at least 2 inches between the bottom of the siding and the roof surface. This gap prevents moisture wicking and protects the siding from rot and decay. If your siding touches the roof, it traps water and accelerates damage to both your siding and the roof deck, often leading to costly repairs.
How often should you inspect your roof and siding?
Inspect your roof and siding twice a year, ideally in spring and fall. Walk around your property and look for curling shingles, granule loss in gutters, cracked siding panels, or gaps in caulking. After major storms, do an extra check for hail damage or wind uplift. Between your own checks, a professional inspection every 3 to 5 years catches issues you might miss at ground level.
Last Updated: October 22, 2026
Quick Summary
Exterior home improvement trends in St. Albert for 2026 favor low-maintenance materials, deeper…
Table of Contents
Start With Project Goals and a Clear ScopeDefine Menu and Service RequirementsSet Measurable Renovation GoalsCommercial Kitchen…