
Custom Home Build Process for Beginners: Step-by-Step
Table of Contents
- The Custom Home Build Process: A Beginner’s Roadmap
- Phase 1: Land Acquisition and Site Assessment
- Phase 2: Design, Budgeting, and Financing
- Phase 3: Navigating Permits and Zoning Requirements for New Homes
- Phase 4: Site Preparation and Foundation Work
- Phase 5: Framing, Rough-Ins, and the Building Envelope
- Phase 6: Interior Finishes and Final Inspections
- Understanding the Custom Home Building Timeline
- Frequently Asked Questions
Last Updated: September 7, 2026
The Custom Home Build Process: A Beginner’s Roadmap
Building a custom home is one of the most rewarding projects a family can undertake, yet the custom home build process for beginners often feels like navigating a maze blindfolded. Between land purchases, construction loans, permits, and dozens of trade contractors, it is easy to feel overwhelmed before the first shovel hits the ground. Building a custom home is one of the most rewarding projects a family can undertake, yet the custom home build process for beginners often feels like navigating a maze blindfolded.
Between land purchases, construction loans, permits, and dozens of trade contractors, it is easy to feel overwhelmed before the first shovel hits the ground. The most common mistake is starting construction before the planning is truly complete.
The truth is that a successful custom home build comes down to preparation, not luck. Most delays and budget overruns trace back to decisions made in the first few weeks, long before framing begins. Below, we break the entire process into six clear phases, covering everything from soil testing to the final occupancy permit, so you know exactly what to expect and when to act.
A custom home build is a construction project where you purchase land, design a home to your specifications, and contract a builder to construct it from the ground up. Unlike buying a spec home, every detail, from the floor plan to the light fixtures, is yours to choose. This level of control is exciting, but it also places the responsibility for budgeting, scheduling, and decision-making squarely on your shoulders.
Phase 1: Land Acquisition and Site Assessment
The first phase of your custom home build begins before any design work, with securing the right piece of land. Not every lot is suitable for every home design, and the characteristics of your property will directly influence your construction costs and timeline.
When evaluating land, consider access to municipal services such as water, sewer, and power. A lot that requires extending utility lines or improving the driveway can add significant expense to your project. You should also verify the zoning designation permits residential construction and review any restrictive covenants that might limit home size, height, or style.
Site Survey and Soil Testing
Once you have a property under consideration, hire a licensed land surveyor to complete a site survey. This document maps the exact boundaries of your lot, identifies any easements, and confirms the legal description of the property. Your architect and builder will rely on this survey to position the home correctly and avoid encroaching on setback requirements.
Soil testing is equally critical. A geotechnical engineer will drill test holes and analyze the soil’s bearing capacity and drainage characteristics. This information determines the type of foundation footings your home requires and whether special measures are needed for poor soil conditions. Skipping this step to save a few hundred dollars can lead to structural integrity issues that cost tens of thousands to repair later.
Phase 2: Design, Budgeting, and Financing
With your land secured, the next stage of the custom home build process is translating your vision into architectural drawings and a realistic budget. This phase requires patience, because the decisions made here lock in the majority of your construction costs.
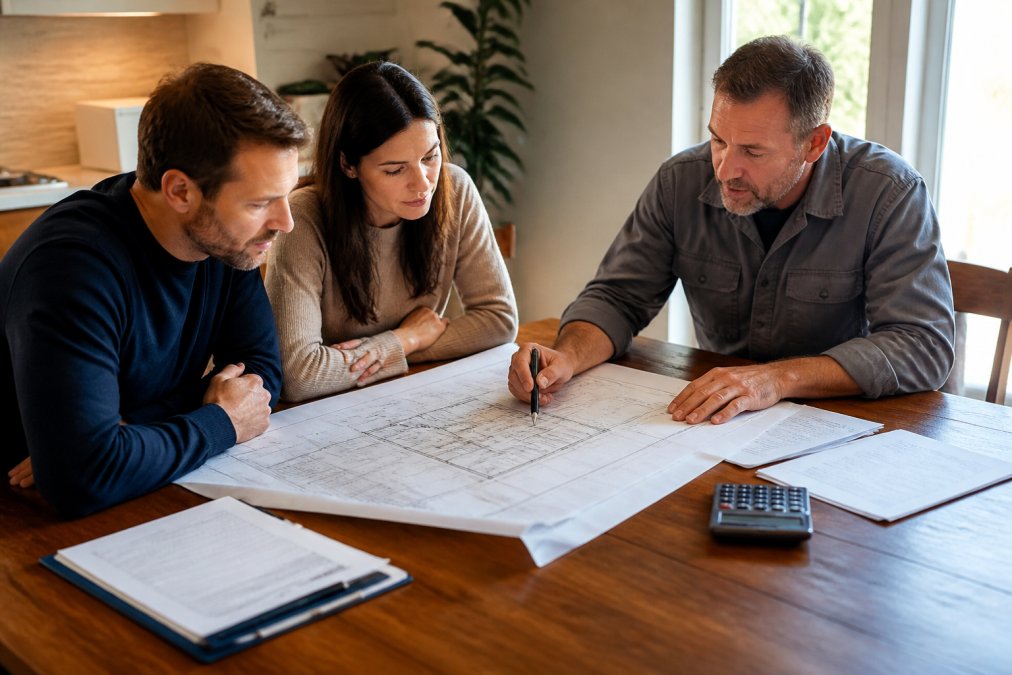
Your architect or design-builder will create a set of blueprints that includes floor plans, elevations, and structural details. These drawings are the instruction manual for your entire project, and they must be complete before you seek pricing from subcontractors. Incomplete drawings lead to vague quotes, which inevitably result in change orders and cost overruns during construction.
Setting Your Construction Budget
Establishing a construction budget requires more than picking a round number you hope to spend. A realistic budget itemizes every component of the build, including land, design fees, permits, site preparation, materials, labour, and a contingency fund. Industry practice suggests setting aside at least ten percent of your total budget for unexpected costs, because surprises are a certainty, not a possibility (nahb.org).
The cost to build a custom home per square foot varies widely depending on your location, the quality of finishes, and the complexity of the design. Rather than relying on national averages, request detailed quotes from your builder based on your specific architectural drawings. A reputable contractor will walk you through each line item so you understand where your money is going before you sign.
Securing a Construction Loan
Financing a custom home build differs fundamentally from a standard mortgage. A construction loan is a short-term, interest-only loan that pays out in stages, known as progress draws, as work completes (consumerfinance.gov). The lender releases funds after inspecting each phase, from foundation to framing to final finishes.
Construction loans typically require a larger down payment and carry higher interest rates than conventional mortgages. You will need to provide your architectural drawings, a detailed budget, and proof of a fixed-price contract with your builder. When the home is complete, you either pay off the construction loan or convert it into a permanent mortgage through a process called a construction-to-permanent loan.
Phase 3: Navigating Permits and Zoning Requirements for New Homes
Before any construction begins, your builder must secure the necessary permits and zoning approvals from your local municipality. This is not a bureaucratic formality; it is a legal requirement that protects your safety and your investment.
The permits and zoning requirements for new homes typically include a building permit, which confirms your plans meet the building code, as well as separate permits for electrical, plumbing, and HVAC work (the EPA). Your municipality will review your architectural drawings for compliance with zoning bylaws, including lot coverage, building height, and setbacks from property lines. The review process can take several weeks, so factor this into your construction timeline.
Municipal inspectors will visit your site at key milestones to verify the work meets code. These inspections cover foundation footings, framing, insulation, and final occupancy. A certificate of occupancy is issued only after all inspections pass, and you cannot legally move into the home without it. Your general contractor manages this process, scheduling inspections and correcting any deficiencies the inspector identifies.
Phase 4: Site Preparation and Foundation Work
The construction phase of your custom home build begins with site preparation. The builder clears the lot, performs site grading to ensure proper drainage away from the home, and marks the exact location of the foundation. Utility connections for water, sewer, and power are brought to the site during this stage.
Excavation follows, digging the trenches that will hold your foundation footings. The footings are poured concrete forms that distribute the weight of the home across the soil. After the footings cure, the foundation walls are constructed, either from poured concrete or concrete blocks. Waterproofing is applied to the exterior of the foundation walls, and drainage tile is installed at the base to direct groundwater away from the structure.
The foundation is the most critical structural element of your home, and it must be done correctly the first time. Once the concrete is poured, fixing a mistake is prohibitively expensive. This is why soil testing and experienced contractors are non-negotiable investments in the custom home build process.
Phase 5: Framing, Rough-Ins, and the Building Envelope
With the foundation complete, your home begins to take shape. Framing crews erect the structural skeleton, including the floor systems, walls, and roof trusses. This phase is exciting because you can finally walk through your home and feel the proportions of each room. It is also the point where change orders become most tempting, and most costly.
Once the frame is up, the mechanical, electrical, and plumbing rough-ins begin. Electricians run wiring to every outlet and switch, plumbers install the pipes for water supply and drainage, and HVAC technicians duct the heating and cooling system. These systems are hidden behind your walls, so any errors discovered after drywall installation are expensive to correct.
The building envelope is the barrier between your interior and the outside elements. It includes the roof membrane, exterior wall sheathing, windows, doors, and insulation. A properly constructed building envelope prevents air and moisture infiltration, protecting your home from rot and mould while improving energy efficiency. The building envelope is also where many sustainability standards, such as enhanced insulation and high-performance windows, are implemented.
Phase 6: Interior Finishes and Final Inspections
The final phase of your custom home build focuses on the details that make the house feel like home. Drywall and insulation are installed, then taped and sanded to create smooth walls. Painters apply primer and finish coats, while flooring contractors install hardwood, tile, or carpet. Finishing carpenters complete the trim work, including baseboards, window casings, and custom millwork.
Kitchen cabinets, countertops, and appliances are installed during this phase, along with bathroom fixtures, lighting fixtures, and interior doors. These finish selections are where budgets commonly overrun, as the range of options and prices is vast. Your builder can guide you through selections that match your aesthetic and your budget, but you should expect to make dozens of decisions in a short period.
The final step is the municipal inspection for your occupancy permit. The inspector verifies that all work complies with the building code and that the home is safe to inhabit. After this inspection passes, you receive your certificate of occupancy, and the custom home build process is complete. Your builder may also provide a home warranty covering specific components for a defined period, and you will conduct a walkthrough to identify any minor deficiencies for correction.
Understanding the Custom Home Building Timeline
A common question from every family planning a custom home build is simple: how long will this take? The custom home building timeline varies based on the complexity of your design, the availability of materials, and the weather, but most projects follow a predictable sequence.
| Phase | Typical Duration | Key Decisions |
|---|---|---|
| Land acquisition and assessment | 1-3 months | Site selection, soil testing, survey |
| Design and permitting | 2-4 months | Floor plan, finishes, municipal approvals |
| Site prep and foundation | 3-6 weeks | Grading, footings, foundation walls |
| Framing and rough-ins | 2-3 months | Structure, electrical, plumbing, HVAC |
| Interior finishes | 2-3 months | Cabinets, flooring, paint, fixtures |
| Final inspections | 1-2 weeks | Occupancy permit, walkthrough |
In total, most custom home builds take between 10 and 16 months from land purchase to move-in day. Weather is the most unpredictable variable, as concrete cannot be poured in freezing temperatures and roofing is dangerous in ice and snow. A realistic builder will build weather delays into your schedule rather than promising an aggressive timeline that cannot be met.
The most common cause of a blown construction timeline is a change order issued after framing begins. Moving a wall, adding a window, or upgrading fixtures mid-build requires rework across multiple trades, which cascades delays through every subsequent phase. Finalize your selections before construction starts.
Beyond the technical steps, the emotional side of the custom home build process deserves attention. Living through a build means months of decisions, budget pressure, and the anxiety of waiting for inspections. Many couples find that agreeing on a decision-making process before construction begins, such as who has final say on finishes versus structural choices, prevents conflict during the stressful phases.
The hidden costs checklist is another area where beginners are often caught off guard. Beyond the construction contract, budget for landscaping, driveway paving, window coverings, and appliances if they are not included. Municipal development fees, utility connection charges, and property tax adjustments during construction also add up. A contingency fund of ten percent of your total budget is the single best protection against these surprises.
When you are ready to move forward, ask potential builders the right questions before signing a contract. Request references from recent clients and call them. Ask how the builder handles change orders, what the payment schedule looks like, and whether they self-perform the work or manage subcontractors. Verify that the company is licensed, insured, and carries workers’ compensation coverage for its crew.
The custom home build process for beginners is demanding, but the payoff is a home designed around your life. Working with a contractor who provides professional project management, transparent communication, and quality craftsmanship makes the difference between a stressful ordeal and a rewarding experience.
Building a custom home is a significant undertaking that tests your patience, your budget, and your decision-making skills. The families who succeed are the ones who prepare thoroughly, ask hard questions, and partner with a builder they trust. At Mario Laflamme Contracting & Renovation Ltd, we offer professional project management for custom home builds and renovations. Get started with a free consultation and let us help you turn your vision into a home you will love for decades.
Frequently Asked Questions
What is the correct order to build a custom house?
The custom home build process follows a clear sequence: land acquisition and site assessment, design and architectural drawings, permits and approvals, site preparation and excavation, foundation and footings, framing, mechanical/electrical/plumbing rough-ins, insulation and drywall, interior finishes, and final inspections. Each phase depends on the one before it, so skipping steps or rushing the timeline often leads to costly rework. A reputable builder can manage this sequence and keep you informed at every stage.
How long does the custom home building process typically take?
A typical custom home build takes 10 to 16 months from groundbreaking to occupancy, depending on the home’s size and complexity. The custom home building timeline includes several weeks for permits, a few months for foundation and framing, and a lengthy finishing phase that many first-timers underestimate. Weather delays and material availability can extend the schedule, especially in Canada.
It is advisable to ask your builder for a detailed timeline before signing and build in a buffer for unexpected delays.
What permits are required before starting a custom home build?
You will need a building permit from your municipality before construction begins. Most areas also require a development permit, and zoning bylaws may impose setbacks, height limits, and lot coverage restrictions. Your builder or designer can typically handle the permit application, but you should confirm they are familiar with the local permits and zoning requirements for new homes in your area. Failure to secure the proper approvals can result in fines or having to tear down completed work.
How do I budget for a custom home build as a beginner?
Start by researching the cost to build a custom home per square foot in your region to establish a realistic baseline. Your total budget must cover land, design fees, permits, construction, landscaping, and a contingency fund of at least 10% for unexpected costs. Get detailed quotes from your builder and review them line by line. Avoid financing the land and construction separately without understanding how your construction loan’s progress draws work.
How do I know my builder won’t disappear halfway through the project?
Ask for proof of licensing and insurance, and request references from recent clients in your area who completed similar projects. A reputable builder should provide a detailed written contract that outlines the scope of work, payment schedule, and construction timeline. It is important to check that the contract addresses how change orders and surprise costs are handled. In Canada, lien holdbacks protect you by holding back a portion of each payment until the project is complete.
What happens if the builder finds unexpected issues during construction?
Unexpected conditions such as poor soil, hidden rock, or outdated utility connections can surface after excavation begins. A professional builder should stop work, explain the issue, and give you a written change order with the associated cost before proceeding. This is why a contingency fund of 10% to 15% of your budget is essential. Never sign a contract that does not clearly state how change orders and unforeseen site conditions will be handled.
Last Updated: October 22, 2026
Quick Summary
Exterior home improvement trends in St. Albert for 2026 favor low-maintenance materials, deeper…
Table of Contents
Start With Project Goals and a Clear ScopeDefine Menu and Service RequirementsSet Measurable Renovation GoalsCommercial Kitchen…