
How to Finish a Basement with Low Ceilings
Table of Contents
- Start with Basement Ceiling Height Requirements
- What You’ll Need Before You Begin
- Step 1: Assess Your Clearance and Obstructions
- Step 2: How to Hide Ductwork in Basement Spaces
- Step 3: Best Lighting for Low Basement Ceilings
- Step 4: Paint Colors and Flooring That Create Height
- Step 5: Furniture and Storage for Tight Vertical Space
- Structural Options: Underpinning vs. Bench Footing
- Frequently Asked Questions
Last Updated: September 6, 2026
Finishing a basement with low ceilings is challenging but achievable. You don’t need expensive structural work to fix every height problem; you can design around the constraints to create a comfortable, intentional space. Below, we’ll show you how to assess your space, hide ductwork, and choose finishes that make low ceilings feel higher.
Start with Basement Ceiling Height Requirements
Before buying drywall, know the legal minimums governing your project. Building code requirements for basement ceiling height ensure a space is safe and habitable, and they vary by room type. Most local codes require a minimum of 2.13 meters (approximately 7 feet) for habitable spaces, though some areas allow 1.93 meters (approximately 6 feet 4 inches) under beams or ducts (up.codes).
Understanding these requirements early prevents a costly mistake: finishing a basement that cannot legally be considered livable space. If your ceiling falls short of the code minimum, you are not necessarily out of options. You may be able to apply for a variance, or you might classify the area as a recreation room rather than a bedroom, which can have different standards. The National Building Code of Canada guidelines provide a baseline, but your municipality may enforce stricter local amendments.
Skipping the permit process to avoid a height inspection is a serious mistake. A finished basement that fails inspection can force you to tear out completed work, and it can create liability issues when you sell the home.
Decoding the Code: Habitable vs. Recreational Spaces
The distinction between ‘habitable space’ and ‘recreational space’ is the most important code concept for a low-ceiling basement. Under the National Building Code of Canada, a habitable room generally requires a ceiling height of 2.13 meters (approximately 7 feet) over the majority of the floor area. Recreational rooms often have a more lenient threshold, sometimes dropping to 1.93 meters (approximately 6 feet 4 inches) for a portion of the room.
This legal classification dictates what you can call the room on a listing and how it is valued.
The ‘Beam and Duct’ Exception
Most codes, including the NBC, allow a reduced height under beams, ducts, and other projecting elements. These can hang down to 1.93 meters (approximately 6 feet 4 inches) from the floor, provided they do not occupy more than a certain percentage of the total floor area (often around 40%). This means you can legally have a bulkhead below the 2.13-meter line, as long as main walking paths and furniture zones maintain full clearance.
Local Amendments and Variances
While the NBC is a model code, your province and municipality have the final say. Some municipalities have adopted amendments altering minimum heights for secondary suites or egress windows. Visit your local building department’s website or call their permit office to ask about minimum ceiling heights for recreational rooms versus bedrooms and any local amendments to the NBC.
If your basement falls short of the code minimum, you may apply for a minor variance through your local Committee of Adjustment. This formal process requires presenting why strict code application creates undue hardship (e.g., a foundation that cannot be underpinned). A well-documented application showing a genuine site constraint is more likely to succeed than one asking to save money.
Your first step is not to measure for drywall; it is to measure for code. Determine your ‘habitable’ vs. ‘recreational’ classification, map your beam and duct intrusions against the 40% rule, and call your local building department to confirm local amendments before you commit to a design.
A Practical Pre-Permit Checklist
Before you even schedule an inspection, run through this checklist to avoid a stop-work order:
- Confirm the ‘as-is’ height: Measure from the finished floor (top of your planned subfloor) to the bottom of the lowest joist or obstruction.
- Identify your room’s classification: Is it a bedroom (requires egress and 2.13-meter ceiling) or a recreation room (more lenient)?
- Call the building department: Ask for the specific section of the local zoning bylaw and building code that applies to basement ceiling height.
- Document everything: Take photos of your measurements and obstructions. This documentation is your evidence if you need to apply for a variance.
- Check for egress requirements: If you are adding a bedroom, you must have an egress window that meets minimum size and sill height requirements, which can be a separate challenge in a low-ceiling basement.
What You’ll Need Before You Begin
A successful project hinges on preparation. Before demolition or framing, gather building permits, a moisture test kit, a stud finder, a laser level, and a lighting layout plan. Confirm the location of your foundation, floor joists, and any existing plumbing or electrical runs.
A basement with low ceilings often sits partially below grade, making it prone to humidity. Install a vapor barrier and check for foundation cracks before sealing the space behind drywall. Rigid foam board insulation against foundation walls prevents thermal bridging and keeps the space comfortable.
Step 1: Assess Your Clearance and Obstructions
Measure your clearance from the top of the slab to the bottom of the ceiling joists. Record the lowest point in the room, not the average, as that dictates your design. Then map every obstruction: ductwork, plumbing pipes, structural beams, and electrical wires below the joists.
A common mistake is assuming every obstruction must be hidden behind a bulkhead. Instead, group obstructions to minimize the footprint of dropped ceilings. If pipes run along one wall and ductwork down the center, build a single soffit along the perimeter rather than boxing each element separately.
Step 2: How to Hide Ductwork in Basement Spaces
Hiding ductwork requires a strategic decision: box it in, paint it, or reroute it. For most homeowners, building a bulkhead around the ducts is most practical. Keep the bulkhead as shallow as possible and run it tight against the ceiling to minimize visual mass.
If ducts are near the perimeter, paint them to match the ceiling color instead of boxing them, making them visually recede. For ducts running through the center, rerouting may be worth the cost. A professional can sometimes move ductwork into a floor joist cavity or consolidate runs into a single trunk line, as improper modification can affect HVAC efficiency.
Step 3: Best Lighting for Low Basement Ceilings
The best lighting for low basement ceilings is recessed, low-profile LED fixtures designed for shallow plenums. They sit flush with the drywall and require minimal clearance, preserving headroom. Avoid pendant lights and chandeliers, which hang into the room and create a visual hazard.
Your lighting layout matters as much as the fixture type. Use a grid pattern with fixtures spaced 1.2 to 1.8 meters apart to eliminate dark corners. Add wall sconces or LED strip lighting at floor level to draw the eye upward, creating the illusion of height.
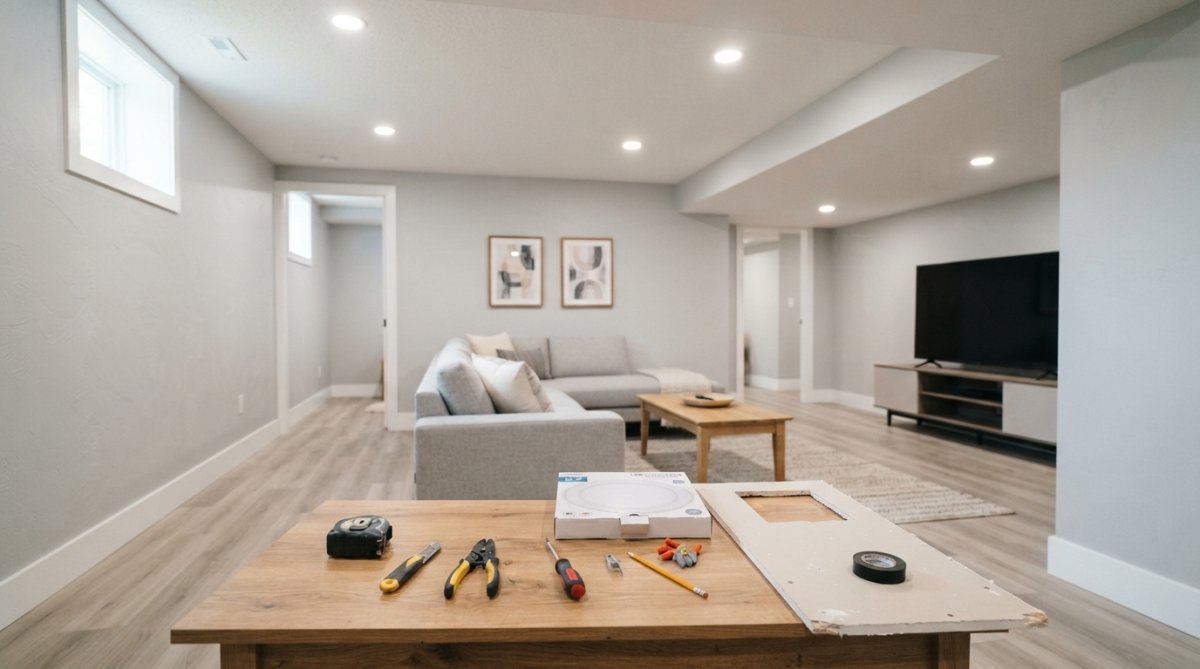
Use a cool white color temperature (4000K-5000K) in a low-ceiling basement. Cool light feels crisper and more open than warm yellow light, which can make a space feel cave-like.
Step 4: Paint Colors and Flooring That Create Height
Paint colors and flooring are powerful tools for tricking the eye. For walls, stick to light, cool tones like soft gray, pale blue, or warm white, which reflect light and recede visually. For the ceiling, always paint it a shade lighter than the walls, ideally bright white, to push it upward.
Avoid thick carpet padding and raised subfloors. Choose luxury vinyl plank (LVP), laminate, or engineered hardwood, which sit close to the slab. If you need a moisture barrier, use a self-leveling underlayment rather than thick foam. A dark or busy floor pattern will make the ceiling feel lower, so keep flooring simple and continuous.
Step 5: Furniture and Storage for Tight Vertical Space
Furniture selection can make or break a low-ceiling basement. Choose low-profile pieces: a sofa with a back height under approximately 76 cm (30 inches), a horizontal coffee table, and low media consoles. This leaves the upper portion of the room visually clear, making the ceiling feel higher.
Built-in cabinetry running along the wall and stopping below the ceiling line is better than tall, freestanding units that emphasize the lack of height. Use wall-mounted shelving for frequently needed items, but avoid cluttering upper walls. The goal is clean sightlines from eye level upward, uninterrupted by visual noise.
Structural Options: Underpinning vs. Bench Footing
If your basement ceiling is too low to meet code, you have two main structural options: underpinning and bench footing. Underpinning involves excavating the existing concrete floor and pouring a new, lower slab, increasing ceiling height. This major project requires careful engineering to ensure foundation walls remain supported.
Bench footing is a less invasive alternative. Instead of lowering the entire floor, you excavate only along the perimeter walls to create a “bench” or lowered ledge. This adds headroom only near the walls, which is often where you place furniture, while leaving the center of the room at its original height. The choice between the two depends on your budget, the condition of your foundation, and how much additional headroom you need. Both options require a structural engineer and a building permit, and they are not DIY projects. The Canadian Home Builders’ Association resources on basement renovation offer a good starting point for understanding the scope of this work.
Underpinning adds height across the entire room but is costly and invasive. Bench footing is cheaper but only adds headroom around the edges. Consult a structural engineer before committing to either path.
The Real Cost-Benefit Analysis: Is It Worth It?
Let’s be direct: underpinning is one of the most expensive renovation line items. A full underpinning of a typical basement can be a significant investment, not including re-finishing. Bench footing is often less expensive for the same area, but it only buys a few extra inches of headroom along the walls, not in the center where you walk.
In many markets, a finished basement with a 1.93-meter (approximately 6 feet 6 inches) ceiling may not add the same value as one with a full 2.13-meter (approximately 7 feet) clearance. The financial return on structural work can vary, making it important to consider if you are making a lifestyle choice or a financial investment. If you plan to live in the home for 10+ years and need the space, the cost may be justified.
If renovating to sell, you are likely better off finishing the space as-is.
The Engineering Reality: What Your Engineer Will Check
A structural engineer will assess three critical factors:
- Soil Bearing Capacity: Underpinning transfers the house load to deeper soil. Clay soil or a high water table makes it more complex and expensive, possibly requiring a geotechnical report.
- Foundation Wall Condition: Poured concrete walls in good condition make underpinning feasible. Block foundations or visible cracks may not handle the stress, making bench footing the only safe option.
- Depth of Excavation: The depth is limited by your existing footings. Shallow footings may only allow 10-15 cm (4-6 inches) of headroom gain, often not enough to make a meaningful difference.
The ‘Design-Around-It’ Alternative: Claiming the Gap
What if you don’t fix the structure at all? Instead of spending $40,000 to gain 15 cm (6 inches) of headroom, spend $5,000 to make the low ceiling feel intentional. This ‘design-around-it’ strategy is the most underutilized approach in the renovation industry.
You can mitigate this with a few specific techniques:
- The ‘Cove of Light’ Effect: Install a continuous LED strip light in a shallow cove built into the top of the wall, just below the ceiling. This washes the ceiling with light, making it appear to float and recede upward. The effect can be dramatic.
- Vertical Stripe Wallpaper: Use a wallpaper with a subtle vertical stripe pattern on one accent wall. The vertical lines draw the eye upward, creating a perceived height that is 5-8 cm (2-3 inches) greater than reality.
- Mirror Placement: Place a large, floor-to-ceiling mirror on a wall perpendicular to the main sightline. This doubles the visual depth of the room and tricks the brain into perceiving a larger volume of space.
The Decision Matrix: A Practical Guide
To help you decide, use this simple matrix:
- Choose Underpinning If: You have a poured concrete foundation in excellent condition, you need a full habitable space (like a bedroom), you plan to stay in the home for 10+ years, and you have a budget of $50,000+.
- Choose Bench Footing If: You only need a few extra inches along the walls for furniture placement, you have a block foundation, or your budget is capped at $25,000.
- Choose the Design-Around-It Strategy If: Your ceiling is between 1.98 and 2.08 meters (approximately 6 feet 6 inches and 6 feet 10 inches), you are renovating for resale, or you cannot justify the cost of structural work for the marginal height gain.
The most expensive mistake you can make is paying for underpinning and then realizing you only gained 10 cm (4 inches) of headroom. Always get a structural engineer’s assessment before you get a contractor’s quote. The engineer’s report will tell you the maximum possible height gain, and you can then decide if that gain is worth the cost.
A Note on Permits and Inspections for Structural Work
Underpinning and bench footing are not ‘grab a shovel and dig’ projects. They require a building permit, and the inspection process is rigorous. Your local building department will typically require three inspections: one for the excavation (before concrete is poured), one for the rebar and forms (before the pour), and one for the final concrete pour.
You will also need a letter from your structural engineer confirming that the work matches the approved drawings. This process adds 2-4 weeks to your timeline and requires coordination between your contractor, your engineer, and the building inspector.
Frequently Asked Questions
Can you finish a basement if the ceiling is low?
Yes, you can finish a basement with low ceilings, but the finished space must meet minimum building code requirements for headroom. Most local codes require at least 2.13 meters (approximately 7 feet) of clearance under beams and ducts. If your basement is below that, you may need to explore structural options like underpinning or bench footing, or keep the space as a utility area.
A professional contractor can assess your exact measurements and help you plan a code-compliant design that maximizes your livable space.
How to make low basement ceilings look higher?
Use a light, consistent color palette on walls and ceilings to reduce visual compression. Install recessed lighting flush with the ceiling to avoid hanging fixtures that draw the eye down. Keep the ceiling free of dark beams by painting ductwork and pipes the same color as the ceiling so they blend in. Choose low-profile flooring like luxury vinyl plank rather than thick carpet, and use vertical stripes or tall mirrors to create the illusion of more height.
How can I increase the ceiling height in my basement?
The most common methods are underpinning and bench footing. Underpinning lowers the basement floor by excavating beneath the existing foundation, which can add several inches of headroom. Bench footing involves cutting back the inside of the foundation walls to gain space around the perimeter.
Both require structural engineering, building permits, and a professional contractor. A less invasive option is to relocate or box in ductwork and plumbing to clear the lowest points. Always consult a local structural engineer before any excavation work.
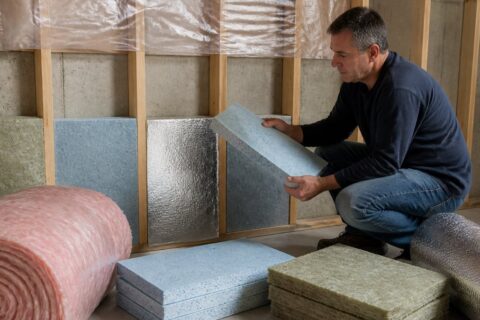
Table of Contents
Diagnose Your Basement Moisture Before InsulatingIdentifying water intrusion sourcesMeasuring moisture levelsBest Insulation for…

Table of Contents
1. Optimize Your Small Kitchen Layout Ideas for Better FlowGalley Layouts for Narrow SpacesL-Shaped ConfigurationsSingle-Wall…