
7 Siding Maintenance Steps for Cold-Climate Homes
Last Updated: November 4, 2026
Quick Summary
Cold-climate siding maintenance means washing panels annually, checking and renewing caulking, clearing gutters, and inspecting for cracks, loose panels, and soft spots after winter. Seal every gap before freeze-up, keep soil at least 15 cm below the siding, and trim shrubs back at least 30 cm from the wall.
- Vinyl siding should only be installed above -6°C because panels get brittle and crack in the cold.
- Work through the fall checklist in one weekend: wash panels, check caulking, clear gutters, and reseat loose panels.
- Inspect siding every spring to catch hairline cracks and failed sealant before freeze-thaw causes rot.
- Use a weather-rated sealant and never caulk the bottom edge of siding or window weep holes.
- Cleaning, caulking, and visual checks are safe DIY jobs; panel replacement and any work above the first storey need a pro.
Table of Contents
- Why Cold Climates Tear Siding Apart
- Best Siding Materials for Cold-Weather Performance
- Your Fall Siding Maintenance Checklist Before the First Snow
- How to Inspect Siding and Spot Damage After Winter
- Moisture Management: Caulking, Flashing, and Vapor Barriers
- DIY vs. Professional Siding Maintenance: What to Tackle Yourself
- Hiring Professional Siding Contractors: What to Ask Before You Sign
- Book a Free Siding Inspection Before Winter Hits
- Frequently Asked Questions
Why Cold Climates Tear Siding Apart
Freeze-thaw cycles are the main reason siding fails in cold climates. Water gets behind a panel, freezes overnight, expands, and pushes the material apart. When it thaws, the gap stays.
That cycle repeats dozens of times each winter. It drives thermal contraction, opens seams, and lets wind-driven snow work its way in. According to National Hardwood’s cold-weather installation guidance, vinyl siding should only go on above -6°C, because panels get brittle and crack when bent in the cold.
This guide covers the full siding maintenance routine for cold-climate homes. Below, you’ll find how to inspect, clean, and seal your siding before and after winter.
Best Siding Materials for Cold-Weather Performance
Fiber cement and steel hold up best in deep cold. Vinyl works well too, but only when it’s installed with room to move.
Here’s how the three common options compare:
| Material | Cold-Weather Strength | Watch For |
|---|---|---|
| Vinyl siding | Flexible, low cost | Brittleness below -6°C, thermal expansion gaps |
| Fiber cement | Won’t warp or rot | Needs paint upkeep, careful caulking |
| Steel | Best impact resistance | Dents, fastener pull-through |
James Hardie’s climate-engineered product line is built around freeze-thaw resistance, which tells you how seriously manufacturers treat this issue.
Vinyl, Fiber Cement, and Steel Side by Side
Vinyl expands and contracts more than any other cladding. Panels need loose nailing so thermal movement doesn’t buckle them. Fiber cement resists rot and warping but needs repainting. Steel shrugs off moisture and impact, though it can dent.
For a deeper comparison of what performs best here, see our guide to the best siding materials for St. Albert’s cold climate.
Your Fall Siding Maintenance Checklist Before the First Snow
Get your siding winter-ready before the temperature drops. Work through this siding maintenance checklist in one weekend:
- Wash all panels with a soft brush and mild soap
- Check caulking around windows, doors, and corners
- Clear gutters and downspouts of leaves
- Trim shrubs back at least 30 cm from the wall
- Look for loose or lifted panels and reseat them
- Confirm downspouts carry water away from the foundation
Cleaning Siding Before Winter
Annual washing matters more than most homeowners think. Dirt and mildew left on vinyl through winter can trap moisture and lead to panel warping or mold, according to Puetz Construction’s maintenance guidance. Use a garden hose and a soft brush, never a pressure washer aimed at seams.
How to Inspect Siding and Spot Damage After Winter
Check your siding every spring for the signs of siding damage after winter. The goal is to catch failures while they’re still cosmetic, a hairline crack or a failed sealant bead, before freeze-thaw turns them into rotted sheathing.
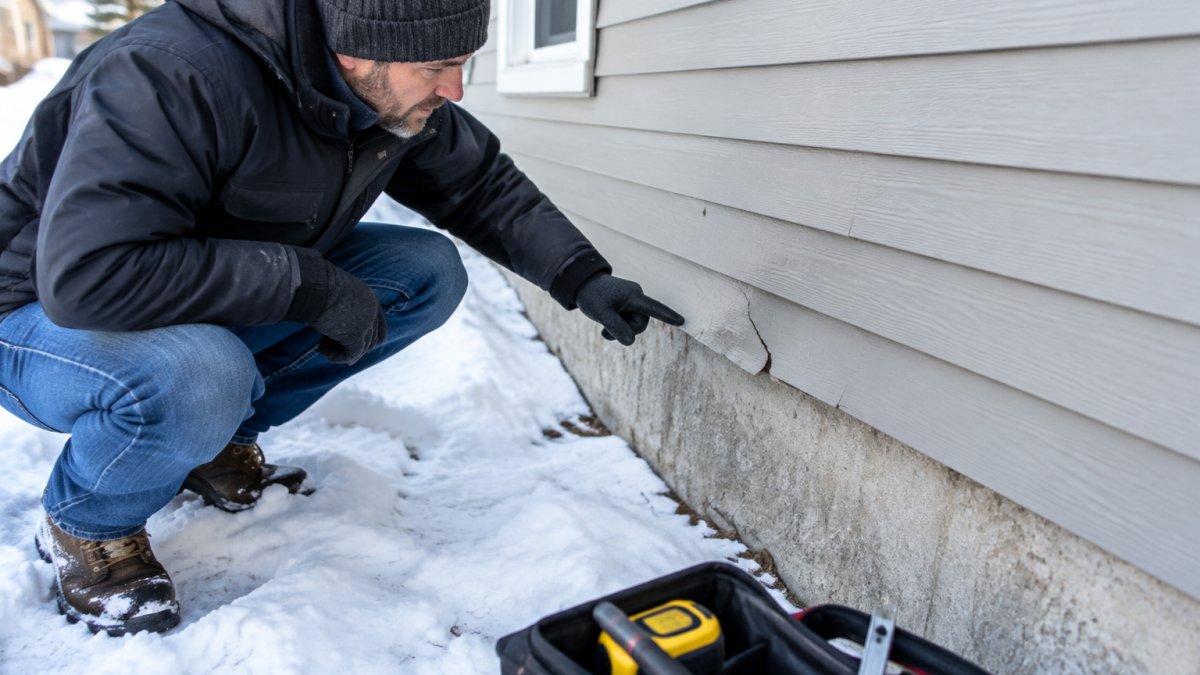
What Cold-Weather Damage Actually Looks Like
- Hairline cracks: fine, often vertical lines, most common on vinyl below -6°C and on fiber cement at fastener points. They start small and widen with each freeze-thaw cycle.
- Seal failures: caulk that has pulled away from the frame, turned chalky, or cracked. Run a finger along the bead, if it lifts or crumbles, it’s failed.
- Loose or lifted panels: vinyl that has buckled or popped its nail slots, usually a sign of over-tight nailing or missing expansion gaps.
- Water stains and streaks: dark vertical streaks below windows, gutters, or roof edges signal water running where it shouldn’t.
- Soft spots and rot: probe trim, corner boards, and the foundation line with a screwdriver. Soft, spongy wood means water has been getting in for a while.
- Fastener pull-through: nails or screws that have backed out or torn through the panel, common on steel and fiber cement after thermal movement.
A Room-by-Room Visual Inspection Guide
Work around the house in order so you don’t miss a wall. North-facing walls see the most freeze-thaw stress and should get the closest look.
- Foundation line: look for rot, stains, and soil piled against panels. Keep soil at least 15 cm below the siding.
- Windows and doors: check sealant for cracks and gaps; confirm weep holes are open.
- Corners: probe for soft spots and loose trim; check that corner caps are seated.
- Under gutters: look for streaks that signal overflow or a loose downspout.
- Roof edge: check flashing where the wall meets the roof and look for ice-dam staining.
- Penetrations: vents, hose bibs, and light fixtures, every one is a potential leak point.
How to Test a Suspicious Spot
Don’t guess. A few simple checks separate cosmetic wear from a real problem:
- The tap test: tap along the wall with a screwdriver handle. A hollow or soft sound over sheathing suggests hidden moisture.
- The probe test: press a screwdriver gently into trim and sheathing at suspect spots. It should resist; if it sinks, stop and call a pro.
- The moisture-meter check: a pin-type moisture meter gives a reading on wood trim and sheathing. Readings that stay elevated after dry weather point to an active leak, not old staining.
- The hose test: on a dry day, run a hose over a suspect window or joint for a few minutes and watch inside for moisture. This isolates whether the flashing or the sealant is at fault.
Watch out: never work above the first storey from a ladder you’re not trained to use, a fall is a far worse outcome than a stained panel.
For a full step-by-step walkthrough, use our DIY exterior home inspection checklist.
Moisture Management: Caulking, Flashing, and Vapor Barriers
Water is the enemy, not cold. Every gap you seal before freeze-up is a gap that can’t fill with water, freeze, and pry a panel loose by February. Moisture management in a cold climate has three layers, and they only work in order: shed water off the surface, drain any that gets behind the cladding, and stop interior vapor from condensing inside the wall.
Caulking and Sealing for Cold Weather
Use a weather-rated sealant rated for low-temperature application and movement. Standard painter’s caulk shrinks and cracks after one or two freeze-thaw cycles, which is exactly when you need it to hold.
- Cut out old, failed sealant rather than caulking over it. New sealant won’t bond to a dirty or crumbling bead.
- Caulk joints around windows, doors, corner trim, and where siding meets masonry or foundation.
- Apply in dry conditions above the sealant’s minimum application temperature; most cold-rated products specify a minimum around 0°C to 5°C, so read the tube.
- Tool the bead so it forms a concave fillet that sheds water instead of a flat smear that traps it.
Watch out: caulking the bottom edge of siding or the weep holes in window frames seals the drainage path and traps water behind the cladding, the exact failure you’re trying to prevent.
Flashing, Ice Damming, and Wind-Driven Snow
Flashing is the first line of defense and the most commonly skipped. Check the flashing above windows and doors, at the roof-to-wall junction, and around any penetration such as vents or hose bibs.
Ice damming is the cold-climate wildcard. When heat escapes through the roof, snowmelt refreezes at the eaves and backs water up under shingles and behind siding.
Wind-driven snow is the other infiltration route. Fine snow forced through seams and around penetrations melts indoors and wets the sheathing. A continuous air barrier and sealed penetrations do more to stop it than any surface coating.
Vapor Barriers and the Drainage Plane
Inside the wall, the vapor barrier’s job is to keep warm, moist interior air from reaching the cold sheathing, where it condenses.
Behind the siding, a drainage plane (house wrap or a rainscreen gap) lets any water that gets past the cladding drain down and out rather than sit against the sheathing.
The National Renewable Energy Laboratory’s cold-climate retrofit study found that insulated siding can deliver more than 50% of the total improvement in a home’s airtightness.
DIY vs. Professional Siding Maintenance: What to Tackle Yourself
Cleaning, caulking, and visual checks are safe DIY jobs. Anything involving heights, rotted sheathing, or full panel replacement is not.
Tackle yourself:
- Washing and rinsing panels
- Re-caulking ground-level joints
- Clearing gutters from a stable ladder
- Trimming shrubs
Call a pro:
- Replacing cracked or warped panels
- Repairing rot or water damage behind siding
- Any work above the first storey
- Resealing flashing at the roof line
If you’re unsure whether damage calls for repair or replacement, our siding replacement vs. repair guide walks through the decision.
Hiring Professional Siding Contractors: What to Ask Before You Sign
Hiring professional siding contractors comes down to a few hard questions. Ask them before anyone touches your house.
- Are you licensed and insured?
- Can you provide references from similar local projects?
- What’s the written timeline, and what happens if weather delays it?
- How do you handle unexpected damage found mid-job?
- What warranty covers labor and materials?
Get answers in writing. A contractor who hesitates on any of these is a risk. For more on vetting and contracts, read our guide to hiring a contractor.
Book a Free Siding Inspection Before Winter Hits
Cold weather exposes every weak point in your siding. A fall inspection now can save you a costly repair in February.
At Mario Laflamme Contracting & Renovation Ltd, we provide exterior renovation services, including siding, roofing, and fencing, to enhance the beauty, functionality, and value of your property.
Get started with Mario Laflamme Contracting & Renovation Ltd and book a free siding inspection before the snow arrives. Visit our siding services page to get in touch.
Frequently Asked Questions
How does freezing weather affect house siding?
Water trapped behind or inside siding panels freezes, expands, and pushes the material apart. Repeated freeze-thaw cycles cause cracking, warping, and fastener pull-through, especially on vinyl. Thermal contraction also opens seams that let wind-driven snow and moisture intrude. Freeze-thaw cycling is a common cause of material failure in cold climates, which is why siding maintenance that keeps water out matters more than any cosmetic fix.
How often should I inspect my siding for winter damage?
Inspect twice a year at minimum: once in fall before temperatures drop below -6°C, and once in early spring after the last freeze. Walk the perimeter looking for cracks, loose panels, lifted caulking, and staining that signals moisture intrusion. Check gutters and downspouts at the same time so meltwater drains away from the wall. Homes with heavy snow loads or large temperature swings should add a mid-winter check after any major storm.
Can cold weather cause siding to crack or warp?
Yes. Vinyl becomes brittle in low temperatures, and manufacturers generally recommend installation only above -6°C because panels can crack under impact when cold. Wood siding absorbs moisture and warps or rots when that moisture refreezes. Fiber cement handles cold better but still needs sealed joints. Choosing a weather-rated material and keeping caulking and flashing intact are the two most effective ways to prevent cracking and warping through winter.
Should I seal my siding before the first snowfall?
Seal failed joints, not the whole wall. Re-caulk gaps around windows, doors, and corner trim with an exterior sealant rated for cold weather, and confirm flashing above openings is intact. Avoid sealing vinyl panels tight, since they need room for thermal expansion. A siding maintenance checklist run-through in early fall, including a wash to remove dirt and mildew, gives sealant the clean surface it needs to bond before sub-zero temperatures arrive.
Your siding faces another hard winter either way. The only question is whether it’s ready. Call Mario Laflamme Contracting & Renovation Ltd for a free consultation and let our team check, seal, and repair your exterior before the first deep freeze.


Last Updated: November 3, 2026
Quick Summary
Low-flow toilets, faucets and showerheads are the bathroom upgrades that save the most water, cutting…

Last Updated: November 2, 2026
Quick Summary
Commercial office interior design is the planning and construction of workspace layouts, finishes,…