
How to Maintain Bathroom Safety Features for Long-Term Use
Last Updated: November 20, 2026
Quick Summary
Maintaining bathroom safety features for long-term use means running regular checks on grab bars, non-slip mats, shower chairs, and caulk lines. Push and pull every grab bar monthly, replace mats that curl or lose grip, and re-anchor any bar that shifts even slightly.
- Wipe grab bars weekly, since soap film makes metal slick and hides rust at the flanges.
- Push and pull each grab bar monthly; a bar that shifts even slightly has failed the test.
- Rinse suction-cup mats weekly, let them dry fully, and replace mats that curl or crack.
- Check behind grab bar mounts, under mats, and around chair legs seasonally for mold and moisture.
- Call a professional if a grab bar will not hold tight or the wall around a mount is soft.
Table of Contents
- Why Long-Term Maintenance Matters for Bathroom Safety
- Your Bathroom Safety Checklist for Seniors: What to Inspect and When
- Grab Bar Inspection and Maintenance: Load Limits, Wear, and Repair
- Non-Slip Bathroom Flooring Maintenance: Cleaning Without Reducing Traction
- Shower Chair Maintenance: Stability Checks and Replacement Signs
- Mold, Mildew, and Water Damage Around Safety Features
- When to Repair, Replace, or Call a Professional
- Book a Professional Bathroom Safety Assessment
- Frequently Asked Questions
Why Long-Term Maintenance Matters for Bathroom Safety
A bathroom safety feature only works if it is still solid, clean, and correctly attached.
A loose bracket or a worn mat can quickly turn a helpful aid into a hazard. A systematic review of home modifications for aging in place, indexed by the PubMed Central database, identifies grab bars and non-slip mats as core bathroom safety upgrades.
Maintenance is not glamorous. It is also the difference between independence and a fall.
Most of the checks take a few minutes, and you can do them yourself. Below, we walk through a full inspection schedule, then break down each feature in detail.
Your Bathroom Safety Checklist for Seniors: What to Inspect and When
A bathroom safety checklist for seniors works best when it is split by how often you check. Daily habits catch the obvious problems. Monthly and seasonal passes catch the slow ones, like rust, loose screws, and worn grip. The schedule below is built around what actually fails over time: fasteners, suction cups, rubber tips, caulk lines, and light output.
Use this schedule as your baseline:
| Frequency | What to Check | Pass/Fail Standard | Time Needed |
|---|---|---|---|
| Daily | Floor clear, surfaces dry, mats flat | No lifted corners; no standing water | 1 minute |
| Weekly | Wipe grab bars; rinse suction mats; check chair feet | No soap film; no missing rubber tips | 5 minutes |
| Monthly | Push-pull test every bar and rail; rock the shower chair; check toilet frame | No movement at the wall plate; no wobble | 10 minutes |
| Quarterly | Caulk lines, drain flow, under-mat moisture, bulb brightness | Caulk flexible and sealed; no soft drywall; no dark spots | 20 minutes |
| Seasonal | Screws at flanges, rust or pitting, decal edges, floor texture | No rust bleed; decals flat; texture still visible | 30 minutes |
| Yearly | Full review with a qualified installer or renovator | Anchors sound; layout still suits current mobility | Varies |
Time Needed
Daily and Weekly Checks
Start with what you see and touch every day.
- Clear the floor. Pick up towels, laundry, and anything that lands on the tile.
- Dry wet surfaces. A squeegee after every shower cuts down on slippery floors.
- Flatten the mats. If a corner curls, press it down or replace it. A curled edge is a trip edge.
- Wipe the grab bars. Soap film makes metal slick, and it hides rust at the flanges.
- Check the shower chair feet. Look for cracks, missing rubber tips, or flattened rubber that no longer grips.
These are small habits. They add up to fewer surprises.
Monthly and Seasonal Inspections
Once a month, put your weight on every support. Push and pull each grab bar. Wiggle the toilet frame. Rock the shower chair.
Seasonally, look at the things that fail slowly:
- Rust or pitting on metal hardware, especially at screw heads and flanges
- Cracked or peeling caulk around the tub and shower
- Dark spots that could be mold, particularly under mats and behind flanges
- Dim or flickering bulbs, and fixtures that have lost brightness
- Loose screws at the mounting plates
- Decals or strips that lift at the edges and trap water
If something feels off, write it down. A short log makes it easier to spot a part that keeps loosening, and it gives a caregiver or a future installer a clear history.
Watch out: a screw that tightens easily every month is not fixed. It is stripping or the anchor is pulling, and the bar should come out of service until it is re-anchored.
Keep a Simple Maintenance Log
A notebook or a note on the phone is enough. For each check, record the date, the feature, what you found, and what you did. Note the brand and model of mats, chairs, and bars when you install them, because replacement parts and warranty claims depend on that information. If you rent the property, share the log with the landlord so repairs are documented. Keeping this record current makes it easier to spot recurring hazards and address them before they lead to a fall, a concern Hudson Medical Co LLC also connects with everyday bathroom safety.
Grab Bar Inspection and Maintenance: Load Limits, Wear, and Repair
Grab bar inspection and maintenance comes down to two questions: is it still attached, and is it still strong?
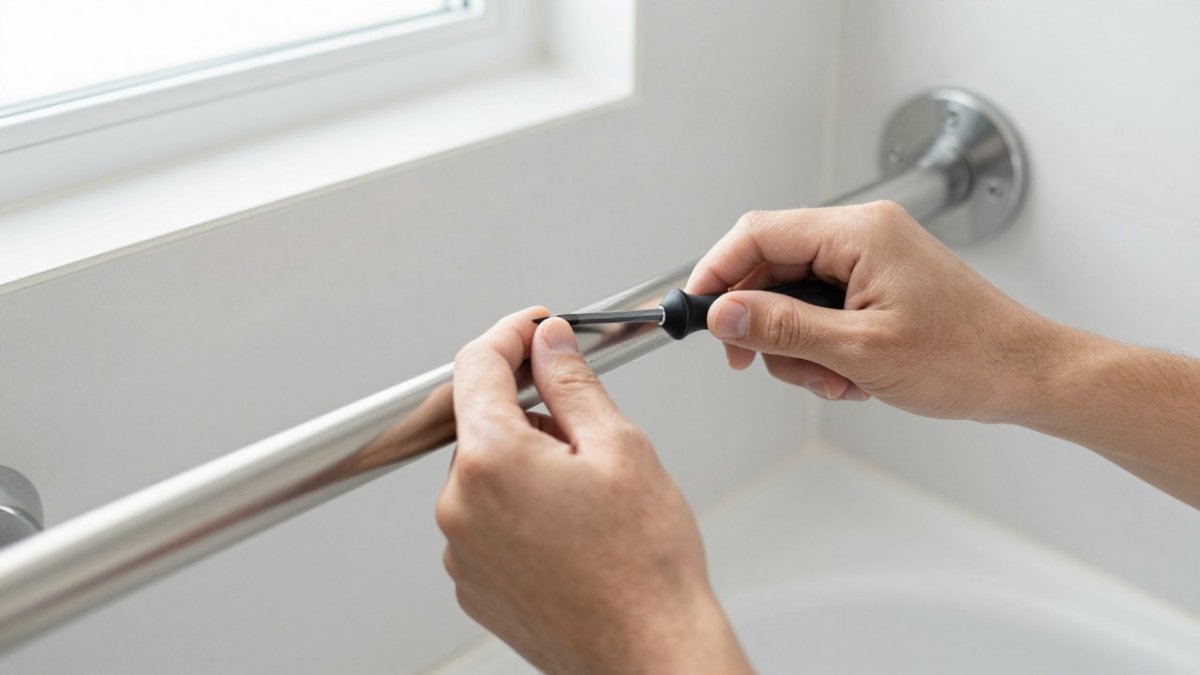
Grab bars are only as strong as their mounting, which is why the fixing into solid blocking or proper anchors matters.
Watch for these wear signs:
- A bar that turns or shifts when you pull it
- Rust at the screw heads or flanges
- Cracks in the wall or grout around the mount
- A bar that feels warm or flexes under load
- Screws that back out repeatedly after tightening
How to Test a Grab Bar for Looseness
- Grip the bar with both hands.
- Push down with steady pressure, then pull toward you.
- Watch the wall where the bar meets it, not just the bar.
- Tighten any screw that turns easily, but note it in your log.
- If the screw will not hold, stop using the bar and get it re-anchored.
A bar that moves even slightly is a bar you cannot trust. Never use a towel bar or a decorative rail as a grab bar. They are not built for body weight, and they pull out of drywall.
Anchoring, Blocking, and When to Call an Installer
A proper installation starts behind the wall. Solid wood blocking or appropriate anchors transfer the load into the framing, and the fastener type has to match the substrate.
Call a qualified installer or renovator if:
- A bar will not hold tight after tightening
- The wall around a mount is cracked, soft, or crumbly
- You need new blocking installed behind the wall
- You are adding a bar in a location where you cannot confirm what is behind the surface
If a bar needs replacing or the wall behind it is damaged, our guide on how to choose bathroom fixtures for a renovation covers what to look for in new hardware.
Watch out: do not re-tighten a loose bar and keep using it as if the problem is solved. Repeated loosening usually means the anchor is failing, and the next pull could be the one that pulls it out.
Non-Slip Bathroom Flooring Maintenance: Cleaning Without Reducing Traction
Non-slip bathroom flooring maintenance has one golden rule: never let soap scum build up. Most grip comes from the texture of the surface, and a film of soap and body oils fills that texture in.
Clean with a soft brush and a mild cleaner. Skip waxes, polishes, and oil-based products, which leave a slick layer. Rinse well, because leftover cleaner is its own slip risk.
For mats and decals:
- Rinse suction-cup mats weekly and let them dry fully
- Replace mats that curl, crack, or lose their grip
- Re-stick rubber decals that lift at the edges
- Check the floor under mats for trapped water
If the floor itself has worn smooth, no amount of cleaning will bring the grip back. That is when choosing bathroom renovation materials for a replacement floor makes more sense than scrubbing harder.
Shower Chair Maintenance: Stability Checks and Replacement Signs
Shower chair maintenance is mostly about the feet and the frame. A chair that wobbles is more dangerous than no chair at all, because it teaches you to trust something that will not hold.
Run this check monthly:
- Feet: Look for cracks, missing tips, or flattened rubber.
- Frame: Check for rust at the joints and bends in the legs.
- Seat: Feel for cracks or a loose seat pan.
- Fit: Make sure the height still suits the user.
Replace the chair if the frame is bent, the feet will not stay on, or the seat is cracked. These parts are not worth repairing.
If you are weighing a chair against a full shower rebuild, our comparison of walk-in shower vs bathtub pros and cons lays out the trade-offs.
Mold, Mildew, and Water Damage Around Safety Features
Water finds every gap. Grab bar flanges, shower chair feet, and mat edges all trap moisture against the wall or floor, and that is where mold starts.
Check these spots seasonally:
- Behind and under the grab bar mounts
- Under the non-slip mat
- Around the shower chair legs
- Caulk lines at the tub and shower base
Soft caulk, dark staining, or a musty smell means moisture is getting in. Remove the old caulk, clean and dry the area fully, then re-seal it. If the drywall or subfloor feels soft, stop and call a professional. Hidden water damage gets worse and more expensive the longer it sits.
When to Repair, Replace, or Call a Professional
Some jobs are a screwdriver and ten minutes. Others need an anchor, a stud finder, and someone who knows what is behind the tile.
Repair it yourself if:
- A screw just needs tightening
- A mat or decal needs replacing
- Caulk needs redoing
- A bulb needs changing
Call a professional if:
- A grab bar will not hold tight
- The wall around a mount is cracked or soft
- You see water damage or mold spreading
- You need new blocking installed behind the wall
The best practices for bathing space design recommend well-draining, threshold-free shower floors and a secure, comfortable place to sit. Those are design decisions, not patch jobs, and they are worth getting right the first time.
When you are ready to bring in help, you can book a bathroom renovation consultation to get a proper assessment.
Book a Professional Bathroom Safety Assessment
Aging hardware, hidden water damage, and loose mounts are hard to spot on your own. A professional assessment catches the problems before they cause a fall.
Mario Laflamme Contracting & Renovation Ltd offers full renovation solutions for kitchens, bathrooms, and basements, plus professional project management for custom homes and commercial spaces.
Frequently Asked Questions
How often should bathroom safety features be checked?
Do a quick visual check weekly: look for loose screws, cracked mats, or wobbly chairs. Once a month, push and pull each grab bar firmly to confirm it stays solid. Every six months, inspect mounting hardware, floor traction, and shower chair feet. After any illness, injury, or change in mobility, reassess the whole bathroom. Keep a simple log of inspection dates and any repairs so you can spot wear trends before they become hazards.
How do you know if a bathroom grab bar is still secure?
Grip the bar and pull down and outward with steady pressure. It should not shift, rotate, or creak. Check that all screws are tight and that the wall around the mounts shows no cracks or water stains. If the bar moves even slightly, stop using it until it is re-anchored. A grab bar inspection and maintenance routine should include checking that the mounting points are into solid blocking or studs, not just drywall.
How should you clean non-slip bathroom surfaces without damaging them?
Use warm water and a mild dish soap or pH-neutral cleaner. Avoid oil-based or wax-containing products, which leave a slippery film. For textured floors or decals, scrub gently with a soft brush, then rinse thoroughly and dry. Never use abrasive powders or steel wool on non-slip coatings. Test any new cleaner on a small hidden area first, and recheck traction with wet hands after cleaning.
When should a worn bath mat or non-slip strip be replaced?
Replace a bath mat when the suction cups no longer grip, the edges curl, or the surface feels slick even when dry. Non-slip strips should be replaced when they peel at the edges, lose grit, or trap discoloration that won’t scrub out. As a rule, inspect mats and strips monthly and plan to replace them every 12 to 24 months, sooner in high-use bathrooms or if you notice any reduction in grip.

Last Updated: November 6, 2026
Quick Summary
The best ways to document home renovation for resale are to collect permits, inspection reports,…
Last Updated: November 19, 2026
Quick Summary
For high-traffic kitchen flooring, luxury vinyl plank is the most forgiving choice for busy…