
Kitchen Island Design Tips: A 2026 Guide
Last Updated: October 23, 2026
Quick Summary
Kitchen island design starts by defining your island’s primary function, whether it’s meal prep, casual dining, storage, or entertaining, since this choice shapes every decision about size, shape, and utilities. Size your island by measuring your room, subtracting required aisle widths of 91 to 122 centimetres, and letting the remaining space set your maximum footprint.
- Standard island counter height is 91 centimetres with a 38-centimetre overhang for seating and 38 centimetres of knee clearance underneath
- Minimum walking clearance around an island is 91 centimetres on all sides; 107 centimetres feels generous in larger kitchens
- Island depth typically ranges from 61 to 76 centimetres, with 91 centimetres or more needed if including a sink or cooktop
- Utility surprises are the number one reason kitchen renovations exceed budget, so consult a contractor early about plumbing, gas, and electrical placement
- A 1.8-metre seating overhang fits three stools with 61 to 66 centimetre seat heights; allow 61 centimetres of width per person minimum
Table of Contents
- Define Your Island’s Primary Function
- Choose the Right Kitchen Island Size for Your Space
- Kitchen Island Dimensions and Clearance Requirements
- Kitchen Island Layout Ideas to Match Your Room
- Kitchen Island Storage Ideas for Maximum Organization
- Kitchen Island Seating Ideas and Overhang Planning
- Plan Utilities, Appliances, and Budget Before You Build
- Frequently Asked Questions
Define Your Island’s Primary Function
A strong kitchen island design starts with understanding what you actually need it to do. An island that tries to be everything often ends up being nothing particularly well.
Your island’s primary function shapes every other decision: size, shape, storage, seating, and utilities. Homeowners who clarify this first avoid expensive redesigns later.
Common primary functions include meal preparation, casual dining and entertaining, storage, or a combination. Some islands anchor the kitchen workflow; others create a social hub. Handling both requires intentional planning.
Ask yourself: Will this island be where you prep food, where family eats breakfast, where guests set drinks, or where you hide clutter? Your honest answer determines the layout.
Modern Kitchen Design Trends St Albert shows that islands now serve multiple purposes by design, which means your planning needs to be clear about priorities. If entertaining ranks higher than prep work, your counter height, seating, and storage will differ from a prep-focused island.
Write down your top three uses for the island and rank them. The #1 use drives 70% of your design decisions. The other two shape refinements.
Choose the Right Kitchen Island Size for Your Space
Island size is a math problem before it is a design choice. Get the numbers wrong and you either waste money on a surface nobody can walk around or choke the busiest room in the house.
Start with the room, not the island.
A simple formula: usable island width = room width − (2 × aisle width).
Use this starting-point table, then adjust for door swings, appliance clearances, and traffic paths:
| Kitchen footprint | Recommended island footprint | Aisle target | Notes |
|---|---|---|---|
| Under 100 sq ft | 610 × 914 mm to 762 × 1,219 mm | 76-91 cm | Consider a rolling butcher-block cart or a peninsula instead |
| 100-150 sq ft | 914 × 1,219 mm to 914 × 1,524 mm | 91 cm | One function only, prep or seating, rarely both |
| 150-200 sq ft | 914 × 1,524 mm to 1,067 × 1,829 mm | 91-107 cm | Room for a prep sink or two stools |
| 200-300 sq ft | 1,067 × 1,829 mm to 1,219 × 2,134 mm | 107 cm | Can support prep plus seating plus storage |
| Over 300 sq ft | 1,219 × 2,134 mm and up | 107-122 cm | Watch the work triangle; bigger is not automatically better |
Depth matters as much as length. A 61-centimetre-deep island gives a single run of base cabinets and a work surface; 76 centimetres allows deeper drawers or a second shallow cabinet row.
Shape should follow the room. Rectangular islands suit galley and L-shaped kitchens because they preserve parallel aisles. L-shaped or angled islands work in open-concept rooms where the island defines the kitchen zone.
For smaller kitchens, don’t force a fixed island. A 61- to 76-centimetre-deep rolling cart, butcher-block table, or peninsula delivers much of the function without the clearance penalty.
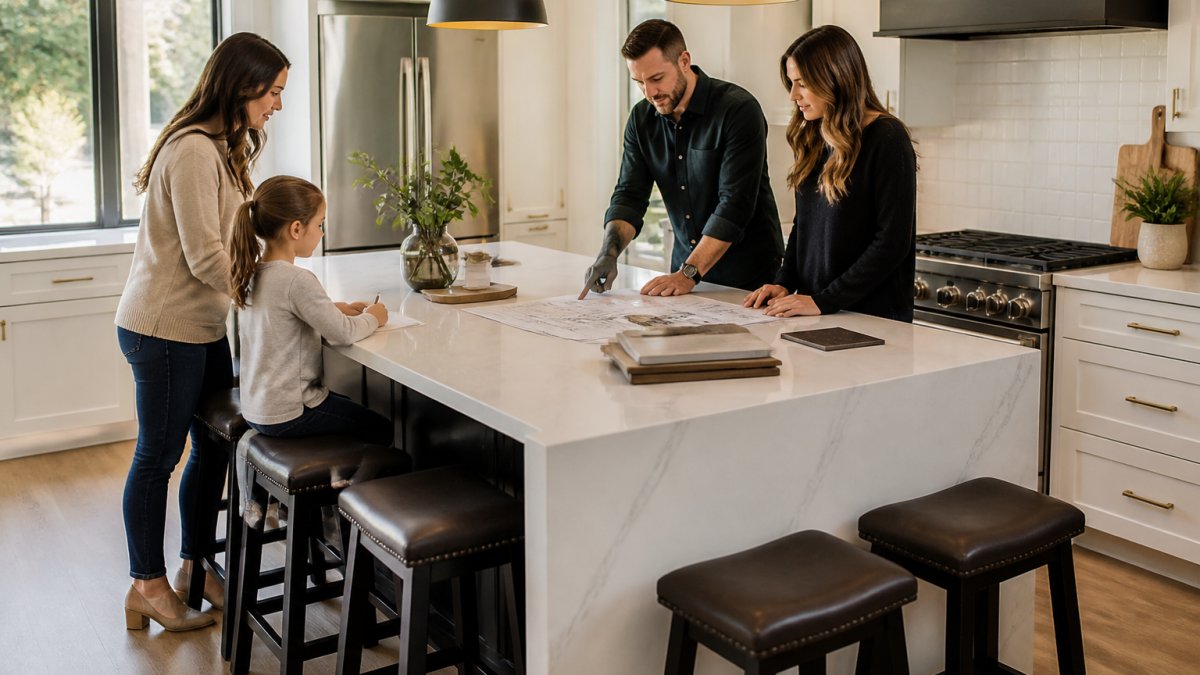
Size the island last. Measure the room, subtract the aisles you actually need (91-122 centimetres depending on use), and let the leftover space set the maximum footprint. Then choose the smallest island that supports your primary function.
Kitchen Island Dimensions and Clearance Requirements
Clearance and dimension standards exist for safety and usability; they’re not suggestions.
A minimum 23-centimetre countertop extension behind a cooking surface on an island or peninsula can help prevent burns and splashes from reaching your body as you work.
Standard island counter height matches your kitchen cabinets: 91 centimetres. A seating overhang on one side typically sits at 91 centimetres too, with 38 centimetres of knee space underneath for stools.
Walking clearance around your island should be at least 91 centimetres on all sides. In tight kitchens, 76 centimetres is acceptable but cramped; 107 centimetres feels generous and works well in larger spaces.
Island depth typically ranges from 61 to 76 centimetres. Shallower islands save space but limit storage and workspace; deeper islands accommodate two rows of cabinetry and provide more usable surface.
If your island includes a cooking surface or sink, add 30 centimetres to the depth to accommodate plumbing or gas lines safely and allow room to work.
Undersized clearance creates a kitchen that feels cramped and becomes a safety hazard when multiple people cook. Measure twice before building.
Kitchen Island Layout Ideas to Match Your Room
Your kitchen’s shape and your island’s position either enhance or undermine your workflow. Layout planning prevents costly mistakes.
In galley kitchens (two parallel counters with a walkway between), a small center island works only if your main appliances aren’t already in that walkway. If they are, skip the island; you’ll block traffic. Consider an end-cap peninsula instead.
Open-concept kitchens benefit from islands that define the kitchen zone without isolating it. A 1.2-metre by 1.8-metre island facing the living area creates sightlines so the cook stays connected to family and guests.
L-shaped kitchens often have room for an island in the open corner.
U-shaped kitchens already have three counter walls. An island here should be smaller and centrally positioned, creating a true “triangle” of workflow between fridge, stove, and sink.
Consider linking your island to kitchen island vs peninsula pros and cons to compare whether an island or peninsula better suits your room’s geometry.
Curved and soft-edge island designs are trending in 2026, according to Sweeten, “8 Kitchen Island Ideas That Will Be Popular in 2026 and …”. These curved edges improve circulation and sightlines in tight spaces.
Review how to design a functional kitchen work triangle to understand how your island placement affects your kitchen’s efficiency.
Kitchen Island Storage Ideas for Maximum Organization
Storage is often the second reason homeowners add an island, after prep workspace. Smart storage design makes the difference between a cluttered island and an organized one.
Cabinetry on both sides maximizes storage. Front-facing cabinets hold everyday items, pots, pans, mixing bowls. Back-facing cabinets (facing the living area in an open-concept kitchen) hide less-attractive items or store less-used appliances.
Drawers outperform cabinet doors for frequently used items; you can see what’s inside without opening them. Deep drawers (30 centimetres or more) hold large pans; shallow drawers (15 centimetres) work well for utensils, linens, and small gadgets.
Open shelving adds visual interest and keeps cookbooks or decorative items accessible. Limit it to 25% of your island’s storage to avoid a cluttered look.
Vertical dividers inside deep drawers keep baking sheets, cutting boards, and large items organized. Pull-out organizers maximize corner space that’s often wasted.
If your island includes a sink or cooktop, position storage on the opposite side so you’re not bending over appliances to retrieve items.
Install soft-close drawer slides. They cost $15-$40 more per drawer but eliminate slamming and extend hardware life by years.
Kitchen Island Seating Ideas and Overhang Planning
Knee space is the measurement people forget. Plan at least 38 centimetres of clear space from the overhang’s front edge to any cabinet or drawer face below.
Stool height must match counter height, not the other way around. For a 91-centimetre counter, choose 61- to 66-centimetre seat heights; for a 107-centimetre bar-height counter, 71- to 76-centimetre seats.
Spacing follows elbow room: allow 61 centimetres of width per person minimum and 66-76 centimetres center-to-center between stools. A 1.8-metre overhang fits three stools; a 1.2-metre overhang fits two.
Household use should drive the final choice. Families with young children often prefer backless or low-back stools that are easy to wipe down and hard to tip, plus a rounded counter edge.
Accessibility isn’t only about wheelchairs. A 76-centimetre-high counter section with 69 centimetres of knee clearance supports seated prep and helps anyone who can’t stand for long periods.
Lighting and outlets belong in the seating plan too. Pendants should hang 76-91 centimetres above the counter to light faces and food without blocking sightlines.
Seating comfort is a chain: 91-centimetre counter, 38-centimetre overhang, 38-centimetre knee space, 61-66-centimetre stool seat height, 61-76 centimetres per person, and 15 centimetres behind backed stools. Plan the household’s needs first, then pick the stool.
Plan Utilities, Appliances, and Budget Before You Build
Utilities are the hidden cost of island design. Running electrical, plumbing, or gas to your island costs far more than most homeowners expect.
A cooktop or range requires gas lines or 240-volt service. Gas and electrical installation costs vary depending on your panel’s capacity and the complexity of the work.
Undercounter appliances like dishwashers or beverage coolers need electrical connections and often plumbing; installation costs vary per appliance.
Lighting over an island typically requires new circuits. Pendants, recessed, or track lighting all need rough-in work before drywall closes; the cost depends on complexity.
Before finalizing your island design, consult a contractor about utility placement. Moving plumbing or electrical after framing costs exponentially more than planning it first.
Refer to how to plan a kitchen remodel on a budget for strategies to manage kitchen renovation costs and avoid budget overruns.
Utility surprises are the #1 reason kitchen renovations exceed budget. Hire a contractor early to assess what’s actually possible in your space.
A well-designed kitchen island becomes the heart of your home, improving workflow, adding storage and seating, and increasing resale value.
At Mario Laflamme Contracting & Renovation Ltd, we help homeowners plan islands that work for their lifestyle and budget. Connect with us for a local kitchen remodel contractors consultation, and let’s build an island that transforms your kitchen.
Frequently Asked Questions
How much clearance should you leave around a kitchen island?
A minimum of 91 centimetres (36 inches) on all sides of your island allows comfortable circulation and movement. If you plan to open cabinet doors or appliance doors, allow at least 122 centimetres (48 inches) for full access. In smaller kitchens, 76 centimetres (30 inches) is the absolute minimum, though this restricts movement. A 23-centimetre (9-inch) countertop extension behind any cooking surface on your island can enhance safety.
What is the ideal kitchen island size for a typical home?
Island size depends on your kitchen dimensions and function. Rectangular shapes are popular for larger kitchens, with many islands exceeding 2.1 metres (seven feet) in length. For small kitchens, 1.2 to 1.5 metres (4 to 5 feet) works well. Measure your kitchen’s total length and width, then ensure your island leaves adequate clearance on all sides. An island should occupy roughly one-third of your total kitchen floor space without overwhelming the room.
Can you put a sink or cooktop in a kitchen island?
Yes, but it requires careful planning. Sinks and cooktops need utility connections: water lines for sinks and gas or electrical lines for cooktops. These must be run through your floor or cabinetry before installation.
Plan the location early with your contractor to avoid costly changes mid-project. Cooktops need proper ventilation, which adds cost and complexity. Discuss your utility budget and timeline with Mario Laflamme Contracting & Renovation Ltd during your consultation to ensure feasibility.
How do you choose between a freestanding and built-in island?
Freestanding islands offer flexibility and can be repositioned if needed; they’re ideal for renters or those unsure about permanent placement. Built-in islands are anchored to the floor and cabinetry, providing stability and integrated storage. Built-in options work better for small kitchens where every inch counts.
Consider your kitchen’s layout, your plans to stay in your home, and whether you need the island to serve as a focal point. Your contractor can help assess which approach maximizes both function and property value.


Last Updated: October 22, 2026
Quick Summary
Exterior home improvement trends in St. Albert for 2026 favor low-maintenance materials, deeper…

Table of Contents
Start With Project Goals and a Clear ScopeDefine Menu and Service RequirementsSet Measurable Renovation GoalsCommercial Kitchen…